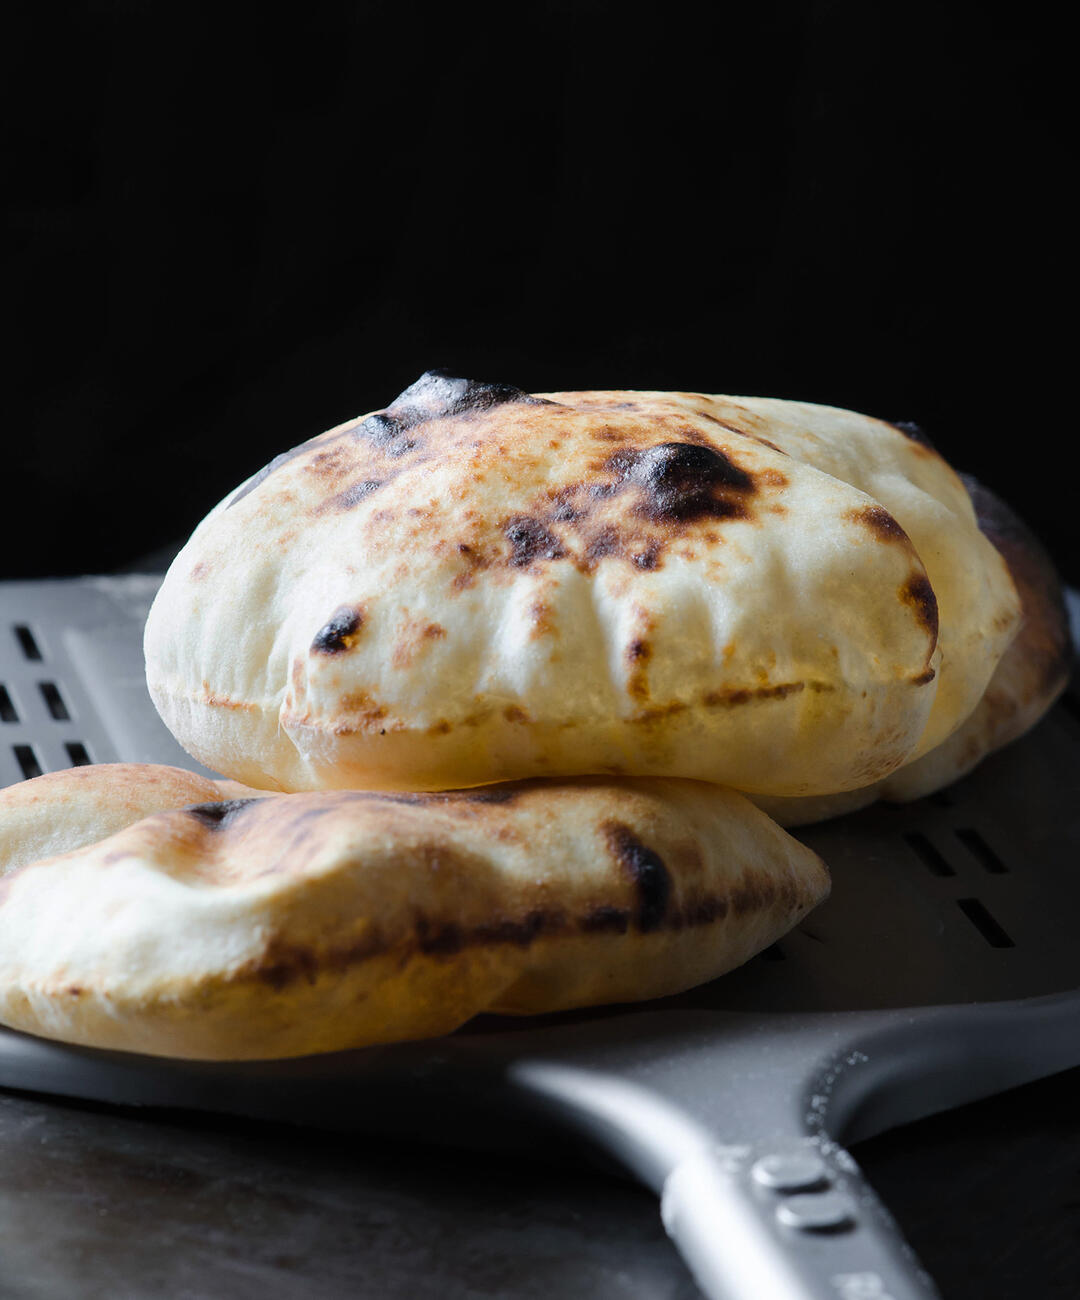
Sourdough Naan / Pita
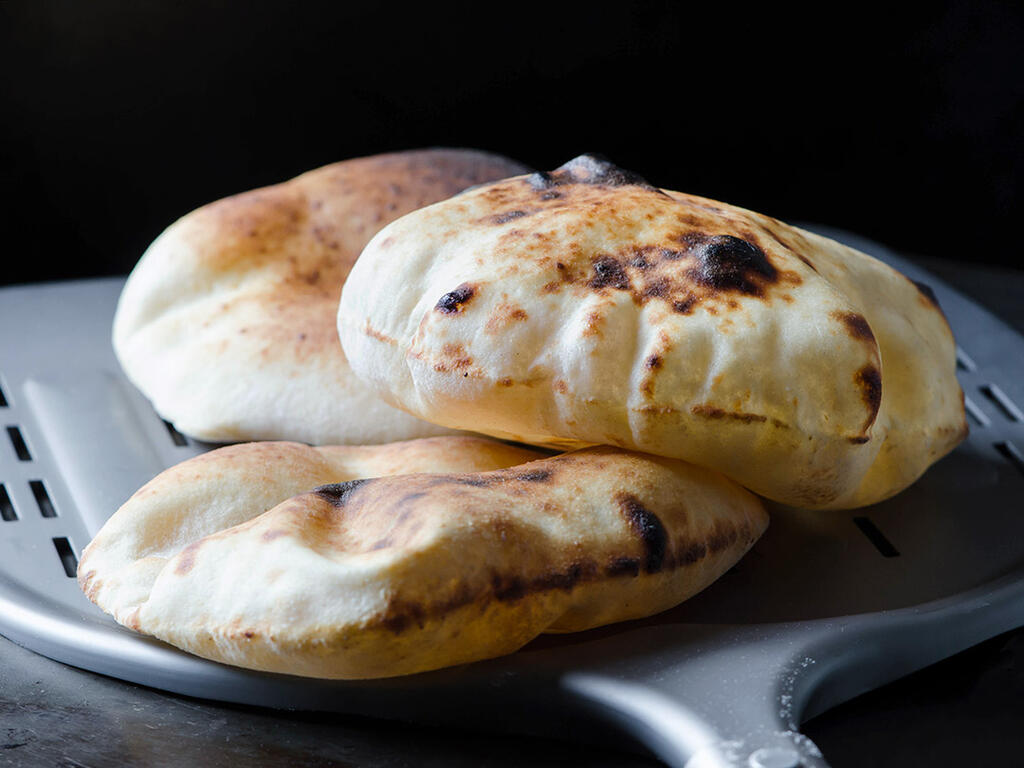
Yes, it looks like pita bread. This is explained below.
RECIPE UPDATED 10/31/22
I refresh my sourdough starter twice a day and feel some guilt when throwing away the leftovers. I perform small feedings to minimize waste but am always on the lookout for ways to use up all of the Moomin bits. Moomin the Starter being my food pet.
I was reworking a roasted red pepper dip last year and figured it was about time to make my own flatbread for scooping. I pulled out a few cookbooks and landed on Sarah Owens' excellent and approachable naan recipe in her aptly-titled, Sourdough. I've since made Sarah's naan more times than I can count with varying percentages of whole grain (the recipe posted here is 20%).
There's something about this flatbread's smell that really does it for me - slightly sweet with a contrasting note of sourdough. It's a delicious and chewy pillow that doesn't even need a dip, just eat it plain or with a swipe of salted butter. The naan is naturally-leavened, straightforward, and can be mixed and baked the same day with great results. I generally prefer to cold fermented the dough overnight which offers additional schedule flexibility and depth of flavor. Instructions for both options are included below.
Grist & Toll's Sonora + Central Milling's Beehive (AP)
During my initial research for the post, I was curious how this recipe compared to traditional versions. Instead of finding a concrete answer, I came to appreciate that there aren't hard dividing lines in the diverse world of flatbread. Ultimately, I got lost in a rabbit hole of how-to videos which was fantastically terrible for time management.
With all that said, here are some general thoughts.
Naan vs. Pita
Texture
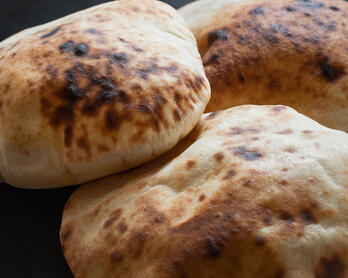
The naan I have tried at restaurants has a very specific texture. It's relatively flat, chewy in the middle, with a crisp bottom and bubbly top. This layered texture is hard to replicate without a traditional tandoor oven. The recipe in this post produces flatbread with a proper pita pocket and naan-adjacent texture. In addition to the type of oven used, how you shape and stretch the dough impacts the texture.
That latter point was interesting to learn throughout my experiments. If you roll the dough evenly, it puffs up like a pita. If you minimally roll the dough then "slap stretch" to finish, the texture ends up being a bit more like traditional naan. While watching naan-making videos, I noticed that the majority of bakers pat, stretch, and slap more than roll. They also stretch the dough thinner than I do. Perhaps this explains why their flatbread puffs in sections but not uniformly. Perhaps?
I won't be attempting to explain the art of the slap and stretch but am including some videos below if you want to give it a go. No matter how you stretch the dough, don't overwork it or it can become tough.
Ingredients
Below is a high level overview of what I understand to be the ingredient differences between naan and pita bread. I welcome corrections if this section isn't accurate.
Naan
- Contains yogurt or milk
- Often contains a fat such as butter or oil
- Teardrop or oval shape
- Lightly crisped bubbly exterior and chewy interior
- Traditionally cooked in a tandoor
Pita
- Does not include dairy
- Made into a round shape
- Drier pocket bread
This Recipe
- Contains yogurt
- Contains oil
- Made into a round shape
- Chewy pocket bread
Original vs. Adapted
Formula
- I left out the inclusions since I wanted a plain flatbread.
- I substituted whole grain for a portion of the all-purpose flour and increased the yogurt and water sightly.
Cooking Apparatus
I use a Roccbox but a conventional oven (as is suggested in Sourdough) will also work. I've included notes for both methods under instructions. Update: Readers have also suggested that cast-iron pans work well.
Recipe Tips
Embrace Your Scale
The recipe in Sourdough lists the ingredients in grams. That's my preferred unit of measurement when it comes to baking so I haven't converted anything.
Flour
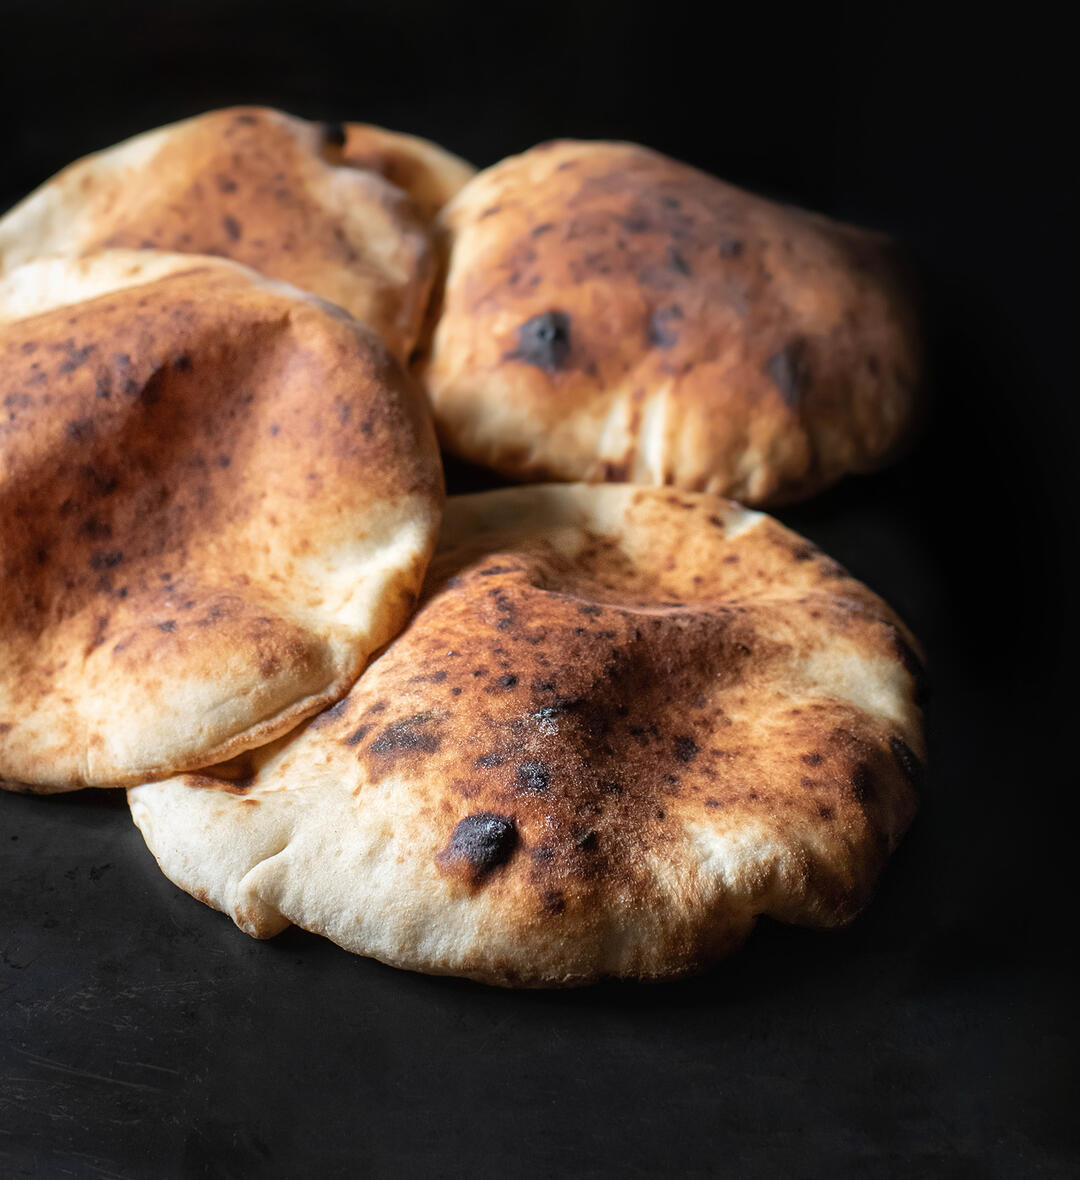
I've used several different kinds of whole grain flour in this flatbread so the recipe can adapt to whatever you have on hand. One specific note is that farro (emmer) is not very extensible so shaping and stretching the dough balls needs to be done with a little more care or it will tear. Also, the top picture has less whole grain wheat than this recipe suggests and the second picture has the same if not a little more. This flatbread is easy to make so I recommend playing around with the percentages to see what you prefer.
Oil
I suggest lightly oiling your hands and the container a couple of times. Use a minimal amount - just enough so things don't stick or dry out.
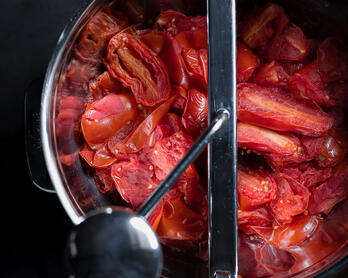
Tomato Water
I posted a slight variation of this recipe that uses tomato water instead of filtered water. That pita is part of a "no waste" series.
If You're So Inclined
I recently ran out of whole-milk yogurt and decided to use 2 tablespoons of creme fraiche and 1 tablespoon of lowfat yogurt figuring I would be splitting the difference (sort of). Creme fraiche is 11 grams of fat per 2 tablespoons while whole-milk yogurt is 5-10 grams of fat per 3/4-1 cup. The pita's texture, flavor, and shelf life all seemed to get a boost from the change which I assume is thanks to the extra fat. This flatbread is fantastic as-is so there's definitely no need to run out and buy creme fraiche. That said, if it's floating around your refrigerator you could consider subbing a little in.
Farmers | Artisans
- Grist & Toll // Whole Grain Spelt, Whole Grain Sonora
- Trattore Farms // Olive Oil
- Central Milling // Organic Beehive (All-purpose) Flour
Tools
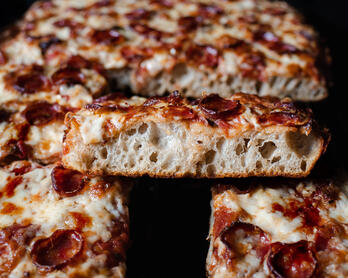
- Roccbox - I have owned this pizza oven for many years and use it almost every week. As can be seen in my naturally-leavened pizza posts here and here, the results are top notch. The oven is portable, easy to use, and requires virtually no maintenance. It's an investment but I highly recommend it.
- Mini Rolling Pin - I bought this rolling pin for the Airstream and liked it so much I bought a second one for the house. It's the perfect size for rolling out the pita dough.
- Silicone Pastry Brush - I own both the small and large. One tip is to only hand wash this brush. I find that silicone absorbs off flavors/smells when run through the dishwasher.
- OXO Scale - This scale is a workhorse that I purchased over 10 years ago and only recently had to replace. RIP scale #1. It's a sturdy cooking companion that repeatedly gets covered in flour, sauce, or whatever else is flying around the kitchen. I recommend keeping liquids away from the screen since they can find their way inside. That being said, the scale seems to dry out and keep on measuring. Note: My original scale with the black pull-out display is now made in all stainless steel. Watch out for the online sellers who are price-gouging and charging a bundle for the older model. As far as I can tell, the new stainless version is the same.
My Favorite Cooking Tools spotlights the kitchen equipment I have owned and used for years.
Ingredients (Adapted from Sourdough - makes four)
- 134 grams ripe 100% hydration Sourdough Starter
- 90 grams filtered water
- 20 grams extra-virgin olive oil
- 40 grams plain whole-milk yogurt Update: See "If You're So Inclined" under Recipe Tips.
- 6 grams refined sugar
- 220 grams unbleached organic all-purpose flour
- 55 grams Grist & Toll whole grain spelt, Sonora, or whole grain wheat of choice Note: See "Recipe Tips"
- 3.5 grams (or round to 4) fine sea salt
- 2 tablespoons salted butter
Instructions for 24-hour Fermentation
Included are hypothetical times that can be tweaked to fit your schedule.
Day 1
12 p.m.
- Feed the sourdough starter with a 50% inoculation. Note: My starter doubles in about 6 hours with a 50% feeding. As can be seen in the following timeline, I'm not mixing the dough when the starter is "peak" and that's perfectly fine. The beauty of this recipe is the flexibility. If feeding the starter later in the afternoon, I just increase the inoculation to 75%.
9:00 p.m.
- In a medium bowl, combine the sourdough starter and water then stir to dissolve. Once the starter is dissolved, add the olive oil, yogurt, sugar, then stir to combine. Do not add the salt.
- Add the flour and mix and squeeze the dough until combined and there aren't any dry bits.
- Once the dry flour is incorporated, knead the dough in the bowl or on the workbench if you prefer. Fold and press until smooth. Note: This process should be a breeze since the dough is pliable and easy to work with.
- Lightly coat a clean medium bowl with extra-virgin olive oil, pat the top of the ball with your oiled hand (or whatever you used to coat the bowl), then place the dough ball in the bowl and cover tightly with plastic. Set aside for 40 minutes.
9:50 p.m.
- Remove the dough ball from the bowl and place on a damp or lightly oiled workbench. Flatten the dough into a disc, then jiggle and stretch the dough until it's about 10-inches wide. The dough will be easy to work with and shouldn't tear. Sprinkle a portion of the salt evenly over the entire surface, fold 1/4 of the round in towards the center and sprinkle some more salt on that piece, then repeat with the other three quadrants as if you're folding a package. Flip the dough and sprinkle any remaining salt on the bottom. Gently press the dough into a round shape and then knead roughly 20-25 times until you have a smooth ball again. You will no longer feel the salt.
- Very lightly oil your hands, pat the dough, then place back into the oiled bowl. Cover tightly with plastic and refrigerate overnight.
Day 2
12:30 pm
- Remove the dough from the refrigerator and set aside to rest for 40 minutes.
- After 40 minutes, cut the dough into 4 even pieces (about 5 ounces each). Flatten each ball into a 5 to 6-inch disc. Holding the dough in the palm of one hand, fold in the edges until you have a round ball. I complete about 6 folds. Place the ball on the workbench seam-side down, cup your hand over the top, then move your hand in a small circle to tighten and round the dough. If a small seam remains on the bottom, gently pinch it closed. Place the ball seam-side down in a lightly oiled container that can be covered. Repeat with the remaining dough. Cover the container tightly and refrigerate. Note: You don't have to refrigerate the dough. If you prefer to proceed to the bake, leave the dough out at room temperature and adjust the following times accordingly.
3:00 p.m.
- About 2 1/2 hours before you intend to bake, pull the shaped dough out of the fridge and let it rest (covered) at room temperature.
4:45 p.m.
- About 45 minutes before you're ready to bake, pre-heat the conventional oven to 500°F degrees and place a pizza stone or baking steel on the middle rack. The Roccbox should be pre-heated to about 750 to 800°F.
5:30 p.m. (or thereabouts)
- Lightly dust your workbench, then dust the dough ball. Brush any excess flour off of the dough.
- Pat the dough ball flat. A few good pats and the disc will be about 4-4 1/2-inches across. Roll evenly from the center to the edge (first pass), turn the disc a quarter turn and roll from the center to the edge (second pass), then repeat a third and fourth time. Just four passes from center to edge should create a 6-inch round. Note: Sometimes I add in one extra pass to even out a wonky edge.
- Transfer the rolled dough to a pizza peel and then to the Roccbox or baking steel. Note: I don't flour the peel. The dough should not stick.
- In a conventional oven, cook for 3-5 minutes on each side until charred and puffed. In the Roccbox, rotate the the naan 180 as soon as it's puffed and set. There is no need to flip.
- While the flatbread is baking, melt a couple tablespoons of salted butter. Lightly brush the hot naan with melted butter and cool on a wire rack.
Instructions for Day-of Mixing & Baking
Included are hypothetical times that can be tweaked to fit your schedule.
Day 1
11:00 p.m. (or whenever you feed your starter at night)
- Feed the sourdough starter with a 25% inoculation. Note: I don't always mix the naan when the starter is "peak" and that's perfectly fine. The beauty of this recipe is the flexibility.
Day 2
10:00 a.m.
- In a medium bowl, combine the sourdough starter and water then stir to dissolve. Once the starter is dissolved, add the olive oil, yogurt, sugar, then stir to combine. Do not add the salt.
- Add the flour and mix and squeeze the dough until combined and there aren't any dry bits.
- Once the dry flour is incorporated, knead the dough in the bowl or on the workbench if you prefer. Fold and press until smooth (about 3 minutes). Note: Kneading by hand is a breeze since the dough is pliable and easy to work with.
- Lightly coat a clean medium bowl with extra-virgin olive oil, then place the dough ball in the bowl and cover tightly with plastic. Set aside for 40 minutes. Note: An ambient temperature of 75°F or thereabouts is ideal. Turning the oven light on can create a similar environment.
10:45 a.m.
- Remove the dough ball from the bowl and place on a lightly oiled workbench. Flatten the dough into a disc, then jiggle and stretch the dough until it's about 10-inches wide. The dough will be easy to work with and shouldn't tear. Sprinkle a portion of the salt evenly over the top, fold 1/4 of the round in towards the center and sprinkle some more salt on that piece, then repeat with the other three quadrants as if you're folding a package. Flip the dough and sprinkle any remaining salt on the bottom. Gently press the dough into a round shape and then knead for about 15-20 seconds (roughly 6 times) until you have a smooth ball again. You will no longer feel the salt.
- Very lightly oil your hands, rub the dough, then place back into the oiled bowl.
- Cover tightly with plastic and set aside for 40 minutes.
11:45 a.m.
- Remove the dough from the bowl and cut into 4 even pieces (about 5 ounces each). Flatten each ball into a 5 to 6-inch disc. Holding one piece in the palm of one hand, fold in the edges until you have a round ball and have created a bit of tension. I complete about 6 folds. Place the ball on the workbench seam-side down. Cup your hand over the top, then move your hand in a small circle to tighten and round the dough. If a small seam remains on the bottom, gently pinch it closed. Lightly oil your hands, rub the dough, and then place the ball seam-side down in an oiled container that can be covered. Repeat with the remaining dough. Cover the container tightly and set aside for 2 hours. Note: Use just enough so things don't stick.
1:45 p.m.
- If you're not ready to bake, refrigerate the dough at this point. Remove the dough from the refrigerator an hour before you want to pop it in the oven.
- If you're ready to bake, pre-heat the conventional oven to 500°F degrees and place a pizza stone or baking steel on the middle rack. The Roccbox should be pre-heated to about 750 to 800F.
2:15 p.m.
- Lightly dust your workbench, then dust the dough ball. Brush any excess flour off of the dough.
- Pat the dough ball flat. A few good pats and the disc will be about 4-4 1/2-inches across. Roll evenly from the center to the edge (first pass), turn the disc a quarter turn and roll from the center to the edge (second pass), then repeat a third and fourth time. Just four passes from center to edge should create a 6-inch round. Note: Sometimes I add in one extra pass to even out a wonky edge.
- Transfer the rolled dough to a pizza peel and then to the Roccbox or baking steel. Note: I have never needed to flour the peel. The dough should not stick.
- In a conventional oven, cook for 3-5 minutes on each side until charred and puffed. In the Roccbox, rotate the the naan 180 as soon as it has puffed and set. There is no need to flip in the Roccbox.
- While the flatbread is baking, melt a couple tablespoons of salted butter. Lightly brush the hot naan with melted butter and cool on a wire rack.
Storage
- Store in a sealed container at room temperature for 1 to 2 days though it's best the day it's baked. A brief warming in the oven or 5-8 second spin in the microwave will wake the gluten up.
- Freeze the cooled pita. To serve, defrost at room temperature then warm briefly. It will be practically indistinguishable from the freshly baked version.
Monthly Roundup
Subscribe at the bottom of this page for the Chic Eats monthly roundup. It includes new and updated recipes along with a grab bag of content that was interesting enough to share around the dinner table.