Overnight Sourdough Waffles

RECIPE UPDATED 7/14/2026
Newsletter
Subscribe at the bottom of this page for the Chic Eats roundup. It includes new and updated recipes along with a grab bag of unique content that was interesting enough to share around the dinner table.
Hijacked
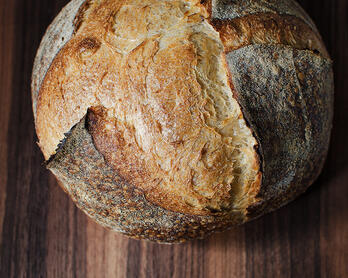
I started making sourdough pancakes one weekend when a sudden craving for waffles hijacked my brain. Since the pancakes were already a work in progress, I flipped through a few cookbooks to see if it was possible to pivot with the ingredients in hand. Nancy Silverton's "Overnight Sourdough Waffles" in Breads from the La Brea Bakery called for 9 ounces of ripe starter, which happened to be the exact amount I had already prepared. The food moons were aligned.
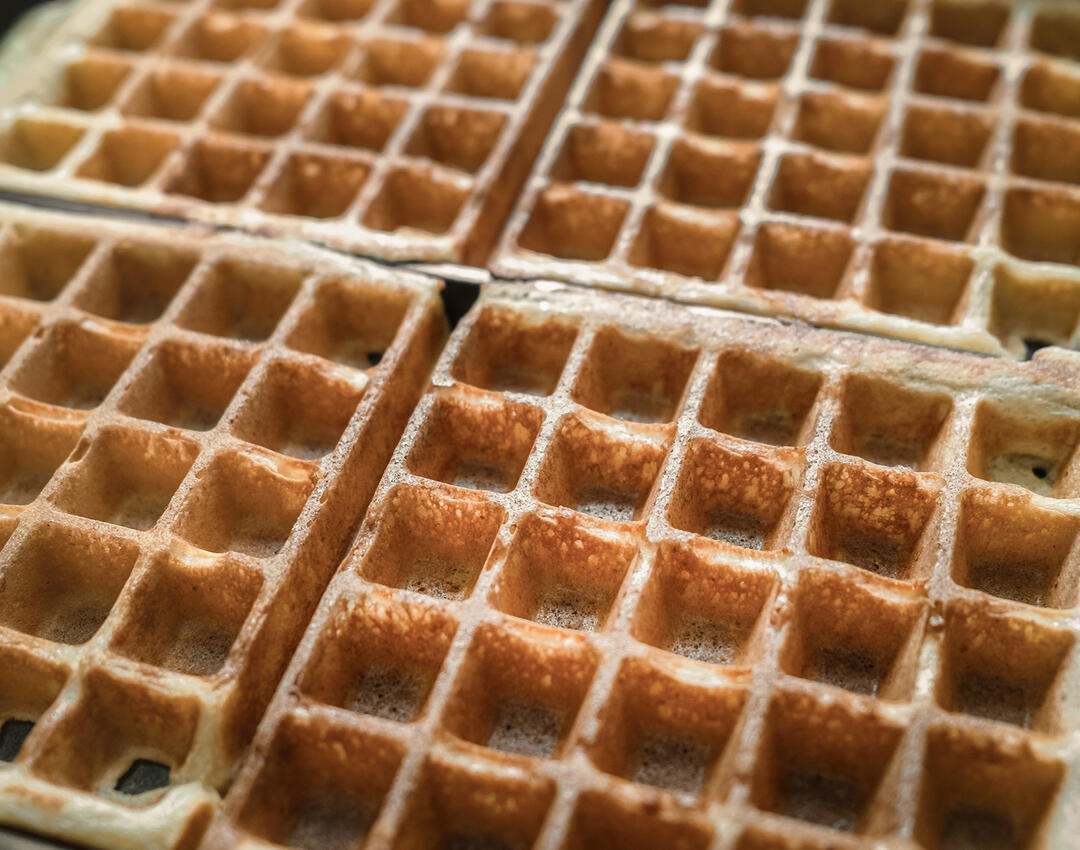
These waffles are so satisfying—buttery and crisp yet sturdy enough to handle a generous drizzle of syrup. The whole grains add a nutty sweetness while the sourdough starter lends a slight acidity that gives the flavor depth. To adapt Nancy Silverton's recipe, I swapped out half of the white flour for whole grain and increased the milk accordingly.
If you don't have a sourdough starter, my post How to Build and Maintain a Sourdough Starter can help. If you're worried about the daily maintenance involved, check out Dave Miller's approach, which reduces feedings and minimizes waste. The joy of food pet ownership can be yours.
Level Up
My primary reason for using whole wheat isn't that it's healthy, though the nutritional benefits are appreciated. I substitute quality whole grains into as many recipes as possible for the same reason I prefer peaches and tomatoes from the farmers market over the grocery store—they're just more delicious.
I'm not disparaging roller-milled flour since it has a place in the pantry, but American cooking seems to have lost its way when it comes to treating flour like a source of flavor in its own right. Examples of foods that taste far better with whole grains include pasta, brownies, pie dough, waffles, pancakes, quick breads of all kinds, cookies, and sourdough bread.
When buying whole wheat, consider the ingredient as you would a tomato. Is it fresh? Is it a delicious variety? Has it been milled and stored properly? All of these factors matter. Low-quality or old wheat flour can be bitter. A few of the places I source flour from are listed under "Farmers | Artisans" below. I also put together a list of grain mills and flour sources across the United States here.
Original vs. Adapted
Flour
As mentioned in the intro, I swapped out half of the white flour for whole-grain Sonora. Whole wheat can add a chewier texture where crispness may be desired, hence the blend.
Refrigeration
The recipe in Breads from the La Brea Bakery calls for leaving the batter out at room temperature overnight. With a high percentage of whole grains and 100%+ inoculation, I felt the mixture might overferment if it sat out that long. Inoculation is the ratio of sourdough starter to fresh flour. I refrigerate the batter overnight and bookend that cold nap with a room-temperature resting period on Day 1 and Day 2.
Milk, Baking Soda, Vanilla
I added 2 ounces of milk to account for the whole grains, increased the baking soda to 1/2 teaspoon, and added 1/4 teaspoon vanilla. Minor tweaks that carried over from my sourdough pancake recipe.
Egg Whites
Update To streamline the process, I recently stopped whipping the egg whites and can't tell the difference. The waffles will have a great texture if you properly ferment the batter. I whipped the egg whites and then folded them into the batter shortly before baking the waffles. This is a technique picked up from Cook's Illustrated that helps lighten the texture.

Tools
My Favorite Cooking Tools spotlights the kitchen equipment I have owned and used for years.
Farmers | Artisans
I make an effort to source my food from California artisans with a special focus on the Santa Monica Farmers Market. Below is a list of the folks who contributed to this dish.
- Tehachapi Heritage Grain Project // Sonora Wheat Berries
- Grist & Toll // Milled Sonora Wheat
- Hayden Mills // Sonora Wheat Berries or Flour
- Central Milling (Sonoma) // Organic Beehive All-Purpose Flour
- Omma's Garden, Apricot Lane Farms, Schaner Farms // Eggs
Ingredients (Adapted from Breads from the La Brea Bakery - 4 to 5 servings)
I never use unsalted butter—don't have any in the house. Also, you can use 2% milk in the recipe and it will turn out fine. That said, whole milk gives the waffles a fluffier interior.
Day 1
- 115 grams (4 ounces) salted butter
- 255 grams (9 ounces) ripe 100% hydration sourdough starter (made with equal parts all-purpose and Sonora whole-grain flours)
- 287 grams (10 ounces) whole milk
- 2 large eggs (110 grams out of the shell)
- 1/4 teaspoon vanilla extract
- 86 grams (3 ounces) whole-grain Sonora flour
- 86 grams (3 ounces) Central Milling Organic Beehive all-purpose flour
- 3 grams (1/2 teaspoon) baking soda
- 15 grams (1 packed tablespoon) brown sugar
- 4 grams (1 teaspoon) organic cane sugar
- 2.8 grams (1 teaspoon) Diamond Crystal kosher salt
Day 2
- Maple syrup for serving
- Salted butter for serving
Instructions
Day 1
- Melt the butter and set aside to cool for about 5 minutes before adding to the batter. The target temperature is around 100°F / 37°C.
- In a large bowl, combine the ripe sourdough starter and milk, then stir to distribute and mostly dissolve the starter.
- Combine the eggs with the vanilla, whisk lightly, then add to the milk mixture.
- Sift together the flours, baking soda, sugars, and salt, breaking up any brown sugar bits. Dump any bran flakes and salt back into the flour mixture and whisk to combine.
- In two additions, fold the flour mixture into the milk mixture. Look out for dry flour hiding on the bottom of the bowl but avoid overmixing.
- Once the butter has reached 100°F / 37°C, add it to the bowl and stir until just incorporated but stop before the cooling butter starts to form large clumps.
- Cover the bowl with a reusable plastic cover and leave out at room temperature for 45 minutes to an hour.
- Transfer to the refrigerator for an overnight nap.
Day 2
You can remove the batter from the refrigerator and go straight to the second bullet—the water bath—if you want to move things along faster. The timeline below allows for about two hours of fermentation before cooking the waffles. I prefer a leisurely morning when making waffles and use that first hour to prep the rest of breakfast (bacon, syrup, etc).
- Remove the batter from the refrigerator, give a gentle stir to ensure everything is incorporated, then let it rest for an hour on the counter.
- Fill a deep pan with warm water (95°F / 35°C) and place the bowl with the batter directly in the pan. After about an hour the temperature of the batter should be 70 to 75°F / 21 to 24°C and will look fermented and airy.
- Preheat the waffle iron. Note: The All-Clad waffle maker setting for this recipe is 3.75.
- For the All-Clad waffle maker, I add a half cup of batter to each section (total of 4 sections). The consistency of the batter is somewhere between plopping and pouring—"thick and elastic" is how Nancy Silverton describes it.
- Bake for 4 to 6 minutes until deep golden brown.
- Serve immediately, or keep warm for a short period on a wire rack in a 175°F / 79°C oven.
Reheating
Waffles reheat beautifully. Once cool, wrap in plastic and foil, place in a sealed bag, then freeze. To reheat, partially defrost the waffles on the counter and then pop them in the toaster. Top with a little butter and jam (or syrup)—fantastic.
Newsletter
Subscribe at the bottom of this page for the Chic Eats roundup. It includes new and updated recipes along with a grab bag of unique content that was interesting enough to share around the dinner table.