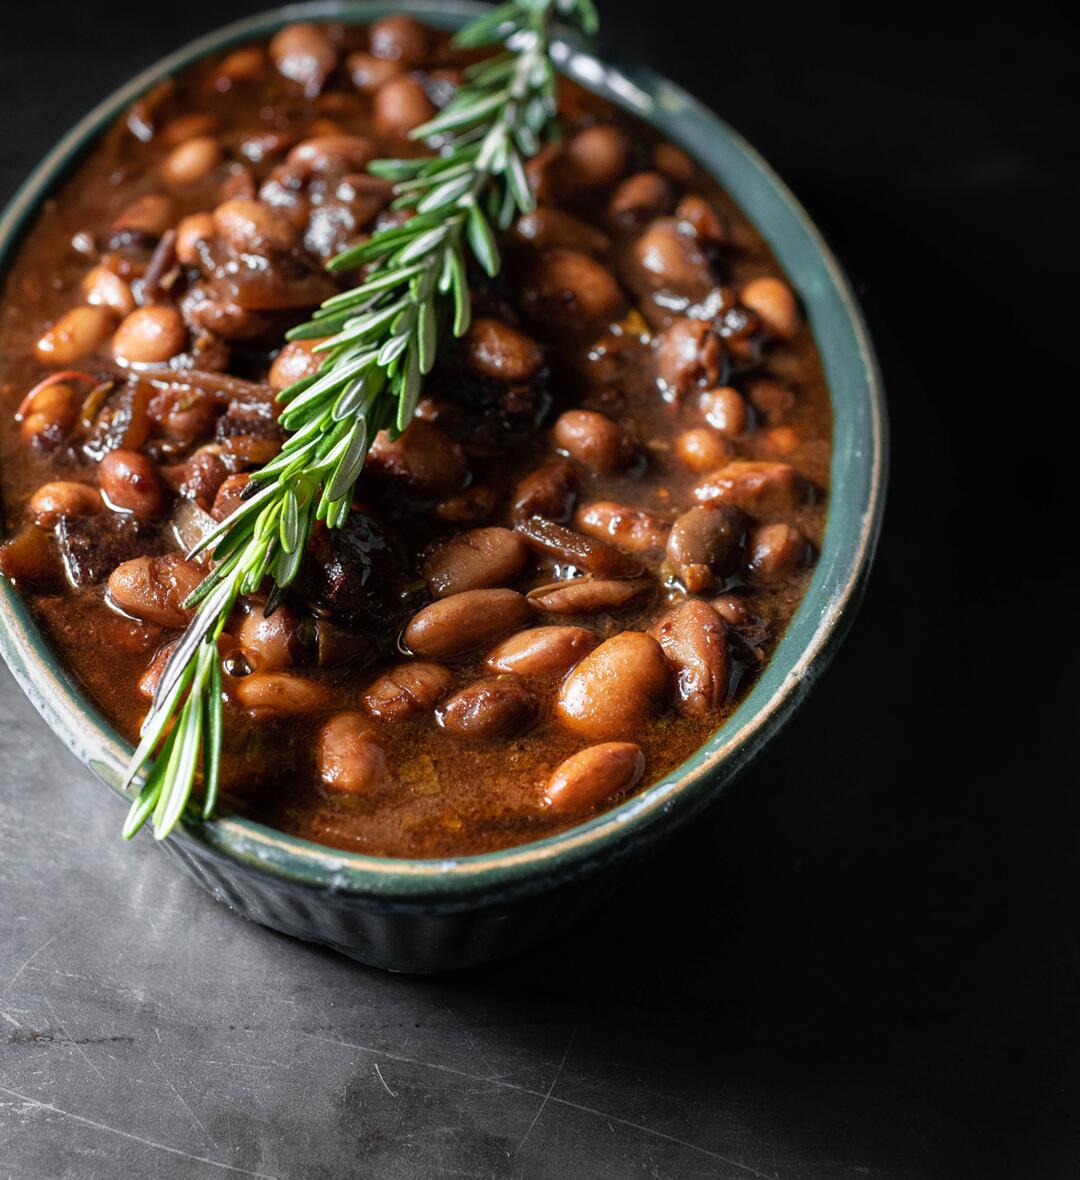
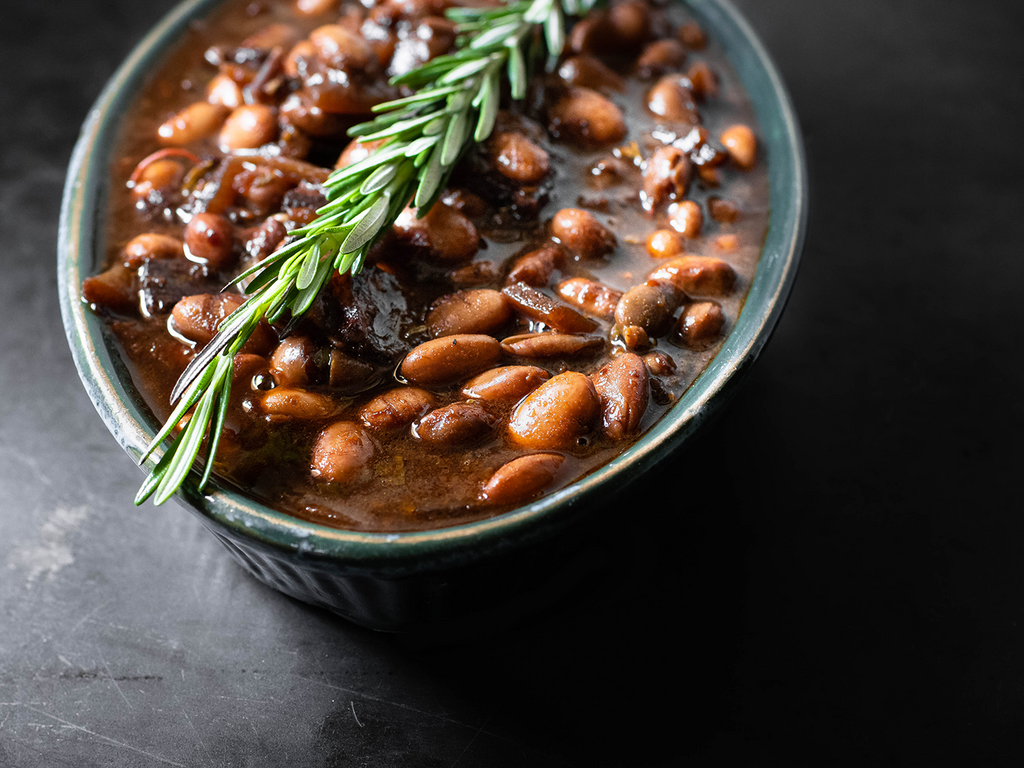
Borracho (Drunken) Beans
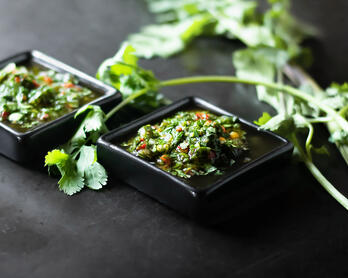
I have tagged what feels like every other page in Chef Josef Centeno's cookbook, Amá. Approachable Tex-Mex seems to have my number right now. I'm 4 for 4 with dishes from the book including cilantro pesto, an excellent flour tortilla recipe, and the pictured Borracho (Drunken) Beans.
The first order of business after flipping through the book was to try my hand at some breakfast tacos. Eggs, avocado, and cheese are nice but relatively unremarkable - you need an anchor to bring it all together and that's where Amá's Borracho Beans come in. The texture of the beans, slight edge of beer, and overall depth of flavor stitches everything together and transforms the dish. These beans are fantastic in a taco or as a side and they love a good hot sauce.
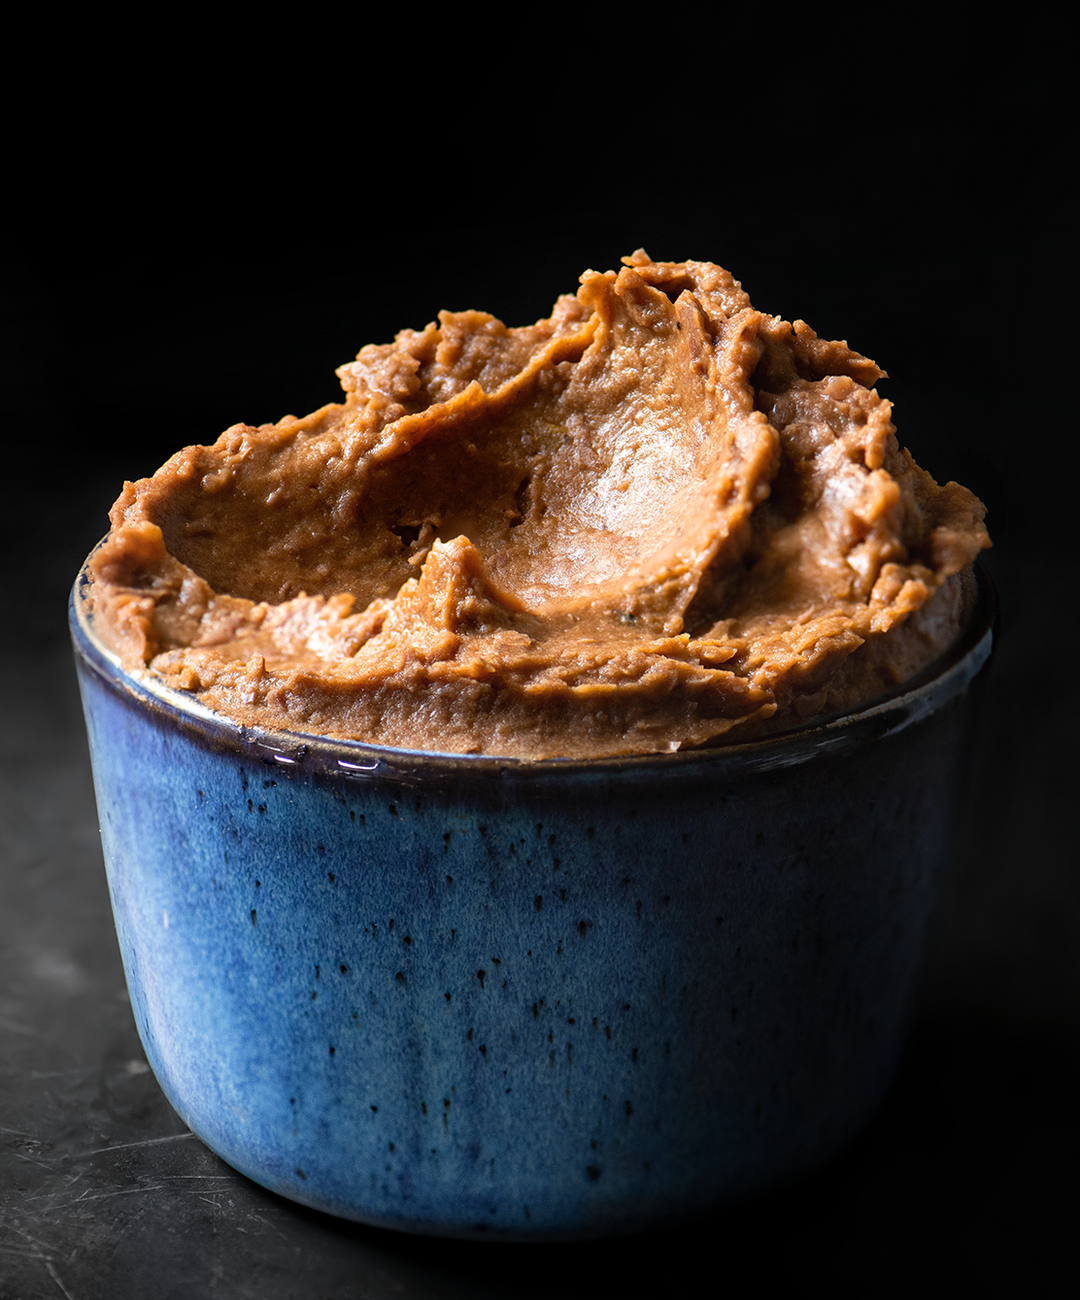
This recipe also makes great refried beans that are perfect for nachos or a burrito. Those instructions included below.
Bean Soaking & Salting
These are controversial topics. Below is my approach along with some articles that I thought were helpful. Carry on as you wish.
Soaking
You don't have to soak dried beans if they haven't been sitting on a shelf for ages. With that said, if you're cooking the beans in a liquid that's part of the dish (i.e. the liquid won't be discarded such as with Borracho Beans) then I recommend soaking them, especially if the recipe specifically suggests the step. Unsoaked beans absorb more liquid which could throw off the ratios.
In terms of soaking methods, there's no need to soak beans overnight though you certainly can. A power soak is my preference. Bring a pot of water to a boil, remove it from the heat, and then drop the beans in and cover securely. Easy and takes about an hour. When comparing overnight and quick soaks, this article suggests that the faster approach results in a superior flavor.
Salting
Some recipes suggest salting makes beans tough, while others (like Nancy Silverton's Ceci) add salt with the legumes. You can also add salt with both the soaking and cooking liquids. I opt for the latter option and add some salt when I power soak and then more when I cook the beans. In my experience, the beans take longer to cook when salted but ultimately end up with a creamier and more even texture. Layering seasoning throughout the cooking process is preferable and the only way for the flesh of the bean to properly develop flavor.
Additional Reading
Original vs. Adapted
Acid Trip
When I want to punch up a recipe, my first step is usually to look at what's providing the acidity and then determine if that can be tweaked or layered. The Borracho Beans from Amá include two tomatoes which provide some nice structure, but I found myself wanting more acidity when tasting the finished product. Citrus felt like a natural pairing so I incrementally added some freshly squeezed orange juice until the flavor popped. I encourage you to add this element since it makes a big difference.
Everybody Likes Bacon, But...
Most recipes (including Amá's) chop the bacon up and leave it in the beans for serving. I find that the bacon has lost its mojo once the cooking process is complete so I leave the strips whole and then discard them once the beans are done. Take a taste of the bacon after the beans are finished and you'll see what I mean. It's emptiness in the form of meat.
Miss You, Peppers
My favorite category of vegetable wasn't in season when I wrote up this post. If you have access to peppers, definitely add them. I plan to once they arrive back at the farmers market.
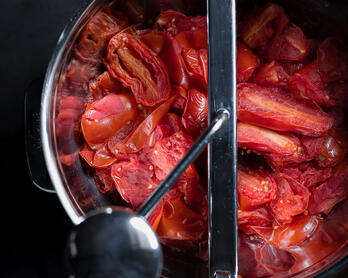
Tomato Skins
Peeling the tomatoes only takes an extra 2-3 minutes and eliminates the little pieces of skin that end up floating on top of the beans. This step is a personal preference but not required.
Farmers | Artisans
I make an effort to source my food from California artisans with a special focus on the Santa Monica Farmers Market. Below is a list of the folks who contributed to this dish.
- Rancho Gordo / Dried Cranberry Beans
- A Cut Above Butcher / Nueske's Bacon
- Finley Farms / Onion
- Milliken Family Farms / Garlic, Herbs
- Coleman Family Farms / Herbs
- Tutti Frutti Farms / Tomatoes
- Wong Farms / Tomatoes
- Smith Family Farms / Tomatoes

Tomatoes at Smith Family Farms - Santa Monica Farmers Market
Tools
- Spice Grinder - Grinding whole spices offers a big flavor payoff for relatively little effort. I eventually bought two grinders, one for sweet or neutral ingredients (mainly sugar and oats) and the other for savory. This model gets the job done and is easy to clean and store.
- Rösle Wire Strainer - After many years of cutting my hand on a broken mesh strainer, I replaced it with this wire version. The capacity is great and I am so happy with the change. Bonus that it doesn't have those little wires that can break and attack your hand.
- For Refried Beans Cuisinart 7-cup or 3-cup Food Processor - I have had these food processors for so long (10+ years) that I ended up replacing the mini's blade because the plastic cracked. I usually turn half of the Borracho Bean batch into refried beans which only requires the 3-cup mini. If you want to make a large batch of refried beans, then you'll need to use the 7-cup capacity or run two batches through the 3-cup.
- For Refried Beans Potato Masher - This isn't the exact masher I have, but it's the closest I could find. The bent spatula design has worked well in all the years I have been using it.
Ingredients (Adapted from Amá)
Borracho (Drunken) Beans
- 1 pound (455 grams) dried cranberry beans Note: I used Rancho Gordo.
- 1 pasilla or ancho chile Note: I used a dried ancho.
- 1/2 teaspoon cumin seeds
- 5 ounces of bacon (number of slices varies)
- 1 onion, 1/2-inch chop (350 grams/13 ounces after prep)
- 1 serrano or jalapeño chile, stemmed, seeded, and finely chopped Note: Peppers are not in season but I would definitely add this if I had it.
- 3 large garlic cloves, minced but not pressed through a garlic press (1/2 ounce/18 grams after prep)
- 1 large or 2 medium tomatoes, peeled, diced (13 ounces/305 grams after prep)
- 1 bunch fresh cilantro (40 grams/1 1/2 ounce bundle)
- 4 cups Mexican lager
- 1 1/2 cups Homemade Chicken Stock
- 1 cup filtered water
- 3 sprigs fresh thyme
- 1 sprig fresh oregano
- 1 sprig fresh rosemary (about 5 inches)
- Fresh cilantro to finish
- Freshly squeezed orange juice (from 1 orange)
Refried Beans
- 1 tablespoons bacon fat
- 1/2 batch of Borracho Beans
Instructions
Borracho (Drunken) Beans
- Bring a large pot of water to a boil - enough to cover the beans by a couple of inches. Add approximately 2 teaspoons of Diamond kosher salt per liter (4 cups) of water.
- Using some kitchen twine, tie together the cilantro, thyme, oregano, and rosemary. Set aside.
- Set up a small/medium bowl with some ice water.
- When the water is just about to a boil, make a small "x" in the bottom of each tomato, then use a wire strainer to add the tomatoes to the pot and let them cook for about 30 seconds. Remove the tomatoes with the strainer and transfer them to the ice bath until cool. Set aside.
- Once the water is at a full boil, stir in the salt and turn off the heat. Add the beans and cover, then set a timer for 1 hour and 15 minutes.
- With a paring knife, grab an edge of the tomato skin "x" and peel it back (the skin should come off easliy). Do this all the way around the tomato then discard the skin. Dice the tomato (minus the stem), cover, and set aside or refrigerate.
- Over an open flame, toast the ancho chile until soft, about 1-2 minutes. A cast-iron skillet will also work if you don't have a gas stove.
- Remove the stem and seeds from the chile and then cut it into 1/2-inch pieces. Combine the chile pieces with some very hot tap water, cover, and set aside.
- In a small skillet, toast the cumin seeds over medium heat until fragrant, about 1 minute. Set aside to cool slightly. Process the seeds in a spice grinder or with a mortar and pestle.
- When the power soak timer expires, drain the beans and set aside. Wipe the pot dry.
- Heat the dry bean pot over a medium flame and cook the bacon slices until they render their fat and start to brown, about 20 minutes. Note: You can cook the bacon faster, but the brand I use (Nueske's) has a nice smoky flavor and the lower the heat the more you can preserve that according to some smoker experts.
- Transfer the bacon to a plate with some tongs and leave the fat in the pan.
- Raise the heat to medium-high and add the onion, diced fresh pepper, and a pinch of salt. Stir the onion around to pick up the fond. If the fond is stubborn, add a couple tablespoons of water and continue to stir in order to loosen things up. Cook until the onion is translucent around the edges, about 5-7 minutes.
- When the onions are almost done, add the garlic and stir constantly until fragrant, about 1 minute.
- Drain the ancho chile.
- Add the diced tomatoes, herb bundle, ground cumin, and drained ancho chile. Stir to combine, making sure to scrape up any fond that is still on the bottom of the pot.
- Add the drained beans, bacon, beer, 1 1/2 cups Homemade Chicken Stock, 1 cup water, and a generous pinch of salt.
- Bring to a boil, then reduce the heat to medium-low/medium so that the liquid has a mellow but decisive simmer. Stir occasionally until the beans are very tender and the broth has thickened, about 1 1/2-2 1/2 hours. Note: When you stir the beans, use the back of the spoon to gently pat them back down under the surface of the liquid. If you find that the beans are still poking up over the liquid a few minutes after stirring, add a few tablespoons of water as needed. You don't want to add any more water than is necessary.
- After about an hour, taste the beans and broth. If the broth could use more salt, add a pinch. The liquid will continue to reduce so keep that in mind when seasoning.
- Once the beans are tender, discard the herb bundle and strips of bacon. Don' worry if some rosemary needles stay behind.
- I recommend cooling and refrigerating the beans overnight before serving so the flavors can marry. Reheat the beans before serving, then add the fresh orange juice 1 tablespoon at a time until you're happy with the flavor.
- Optional: Some fresh cilantro is a nice topper.
Refried Beans
I only make refried beans after the Borracho Beans have had a day to set up. I'm not sure if this makes a difference but figured it was worth mentioning since the starches and flavor have had time to settle.
- In a large sauté pan over medium heat, add the bacon fat and warm until shimmering.
- Add the beans with their liquid, fry for a minute or two, then stir and mash with a potato masher or similar. Continue mashing and stirring until the liquid has cooked down and the texture is where you want it. Leave the beans chunky or run them though a food processor (my preference). Note: Don't let the beans dry out completely or become gluey. It's better to leave the texture a little loose since it's easy to correct. If your beans are too loose after putting them through the food processor, simply return the bean mash to the pan and cook for a couple more minutes to tighten things up.
- Optional: Sauté some finely chopped onion or fresh peppers before adding the beans.
Storage
- The beans are best the next day but can be served immediately.
- Refrigerate beans in an airtight container for up to 5 days.
- I currently have some refried beans in the freezer. I expect they will turn out just fine but can't confirm that in writing.
Coming Up
- Subscribe at the bottom of this page for new posts.
- Follow on Instagram.
- For bread geeks, my naturally-leavened IG journal is here.