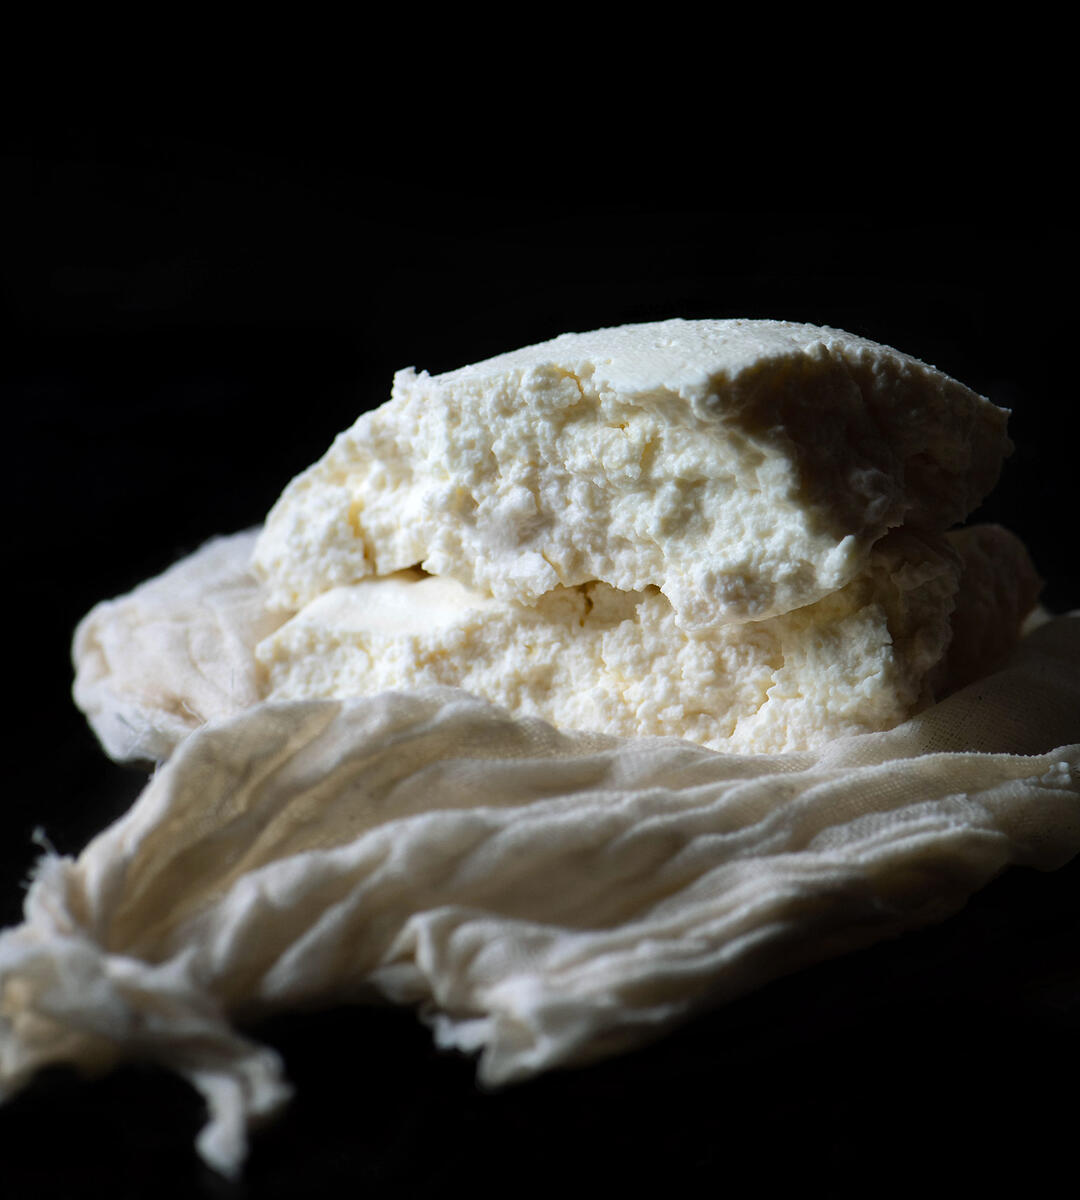
Fresh Ricotta
Of all the fresh ricotta recipes I've made, Chef Jeremy Fox's version from On Vegetables is the winner. The yield is good, the texture is incredibly tender, and the fat, acid, and salt are perfectly balanced. It will ruin you for the white plastic cups of ricotta available at the grocery store.
The three things that distinguish Chef Fox's recipe are a slow gentle cooking method, buttermilk as the acid, and an appropriate and specific amount of salt added at the beginning of the cooking process. Other recipes from equally noteworthy cookbooks push quickly to the target temperature, use lemon juice or vinegar as the acid, and suggest that you "salt to taste" after the ricotta is made. The results from those attempts were edible but lacking in both mouthfeel and flavor.
This also happens to be a no-waste recipe. The byproduct of making fresh ricotta is whey, which is the secret to fantastic polenta. Fox picked up this approach from a chef he worked with and is now passing the wisdom on in his cookbook. Whey can be used to make caramel, polenta, and more. Just freeze it if you're unsure and need to consult with The Google for inspiration.
Included in the post are step-by-step instructions as well as temperature and visual cues. This recipe is easy relatively speaking, you just have to plan ahead a little.
Ricotta vs. Paneer
Technically speaking, this recipe is fresh ricotta and fresh ricotta is paneer. I’m not hung up on exacting terminology but it’s nice to feel informed. As explained on the Good Food website,
Strictly speaking, acid-precipitated cheese from milk is paneer (once it’s compressed). Traditional ricotta is made from whey that’s left over from the cheesemaking process in which rennet or lactic acid has been used to create the formation of curds.
The On Vegetables version is in fact an acid-precipitated cheese from milk, the acid being buttermilk. With all of that said, many cookbooks and websites refer to this combination of fresh milk and an acid as ricotta. Very well then. The more you know.
Salt + Fat
When you have a high percentage of fat such as in this fresh ricotta recipe, you need to balance that fat with salt to achieve any level of flavor. Scientifically speaking, fat has a diluting effect on taste. That last point is important as it informs so many aspects of cooking. For example, I made chorizo with lean bison and then on a different occasion I used a fattier beef. I foolishly didn’t adjust the spice mixture (most importantly the salt), and sure enough some of the seasoning lost its punch with the higher-fat meat.
The recommended salt in this recipe may seem like a lot, but it's not. Trust in the force.
Original vs. Adapted
I make two versions of Chef Fox's recipe. The first has the same ratios as the cookbook and yields a very rich ricotta. The second version reduces the cream by a quarter and increases the buttermilk to compensate. This results in a slightly lighter flavor though I'm still playing around with the adapted version. My suggestion is to try the original first.
Recipe Tips
Nobody Likes to be Agitated
The key when making this recipe is to not agitate the dairy mixture too much. I include a number of specific temperature milestones and notes with the instructions that expand upon this.

Farmers | Artisans
I make an effort to source my food from California artisans with a special focus on the Santa Monica Farmers Market. Below is a list of the folks who contributed to this dish.
The quality of your milk and cream is important. I use Organic Pastures Raw Milk + Cream but have also tried Straus with good results. One note is that my preference is to only use raw milk and cream when it's going to be cooked. There are plenty of Interwebs rabbit holes that will help you make your own call on the subject.
Tools
- Thermapen Digital Thermometer - I have three Thermapen digital thermometers that are distributed between my home, the Airstream, and my mother-in-law's house. They're fast, easy to clean, and the probe makes a perfect cake tester.
- All-Clad Fine Mesh Strainer Set - Mesh strainers serve as a flour sifters, rice rinsers, and roasted eggplant drainers.
- Fine Cheese Cloth x 2
- 8 Quart Non-reactive Pot
Ingredients (Recipe from On Vegetables)
- 2 quarts whole milk
- 2 cups buttermilk
- 1 cup heavy cream
- 2 tablespoons flake-style salt
Instructions
NOTE: These timeframes are estimates. If your milk is really cold, it may take longer to reach the temperature milestones. The important thing is to watch for the cues associated with the milestones.
Minutes 0-30
- Combine the ingredients in a large non-reactive pot. Stir until the salt dissolves.
- Place the pot over a medium flame and leave uncovered.
- Gently stir the mixture 3-4 times during this period. Note: I stick the spatula into the pot at an angle and then very slowly drag it along the bottom. The goal is to not swirl the liquid around while simultaneously ensuring that nothing is sticking or burning on the bottom. This slow stirring also gradually redistributes the heat. The top of the liquid will barely move. Don't worry about the crinkly skin that occasionally forms, it will dissolve away.
- From minutes 10-25, the temperature will rise from 125-150°F.
Minutes 30-40
- At 30 minutes, the temperature is around 145-155°F. My Thermapen is almost always in my hand for the rest of this process.
- After 35 minutes, the temperature will reach 160°F. Be gentle going forward when it comes to agitation.
- At 40 minutes, the temperature will be 170-175°F. When you run the spatula along the bottom as described above, you’ll hear a rumble.
- At 185°F you’ll see curds on the spatula so continue to be gentle when running the spatula along the bottom.
Minutes 40-50
- At 185°F, I turn the heat up slightly to push things to 205°F. This is where I babysit the pot and run the spatula along the bottom one more time.
- From minutes 45-55, the temperature will reach 205°F and the mixture will noticeably break.
- Just as the curds separate and start to bubble gently, turn the heat off and slide the pot to a cool burner.
- Go about your business for at least 30 minutes and let the mixture cool.
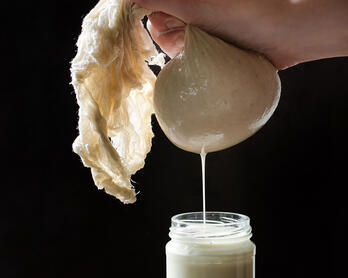
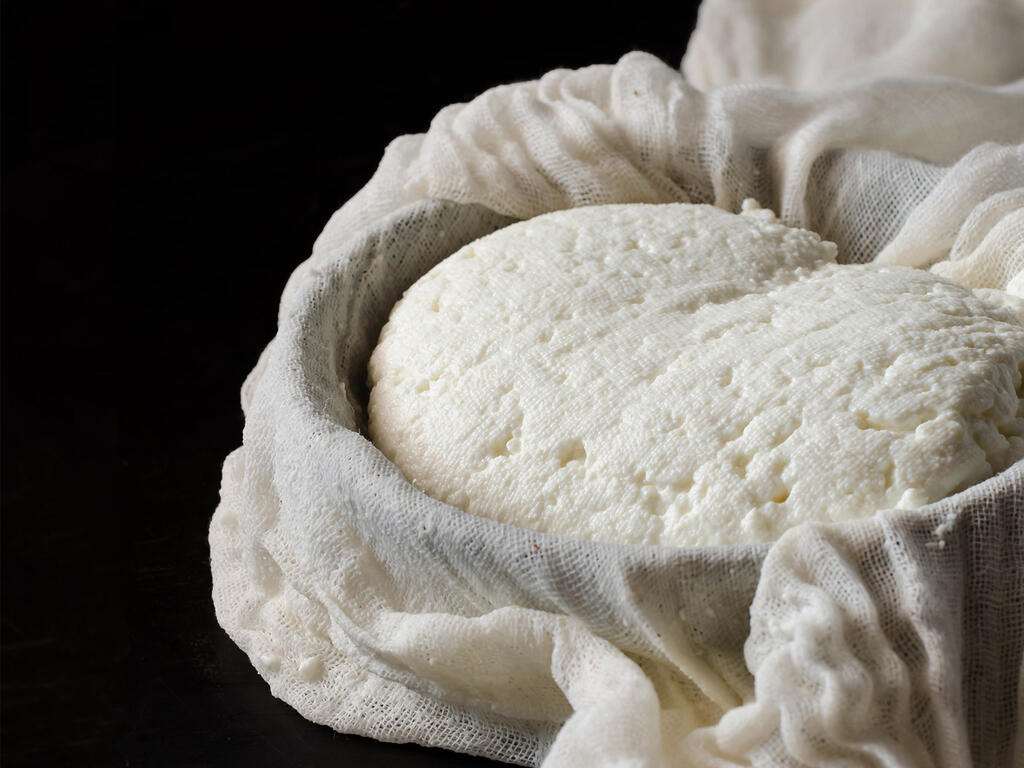
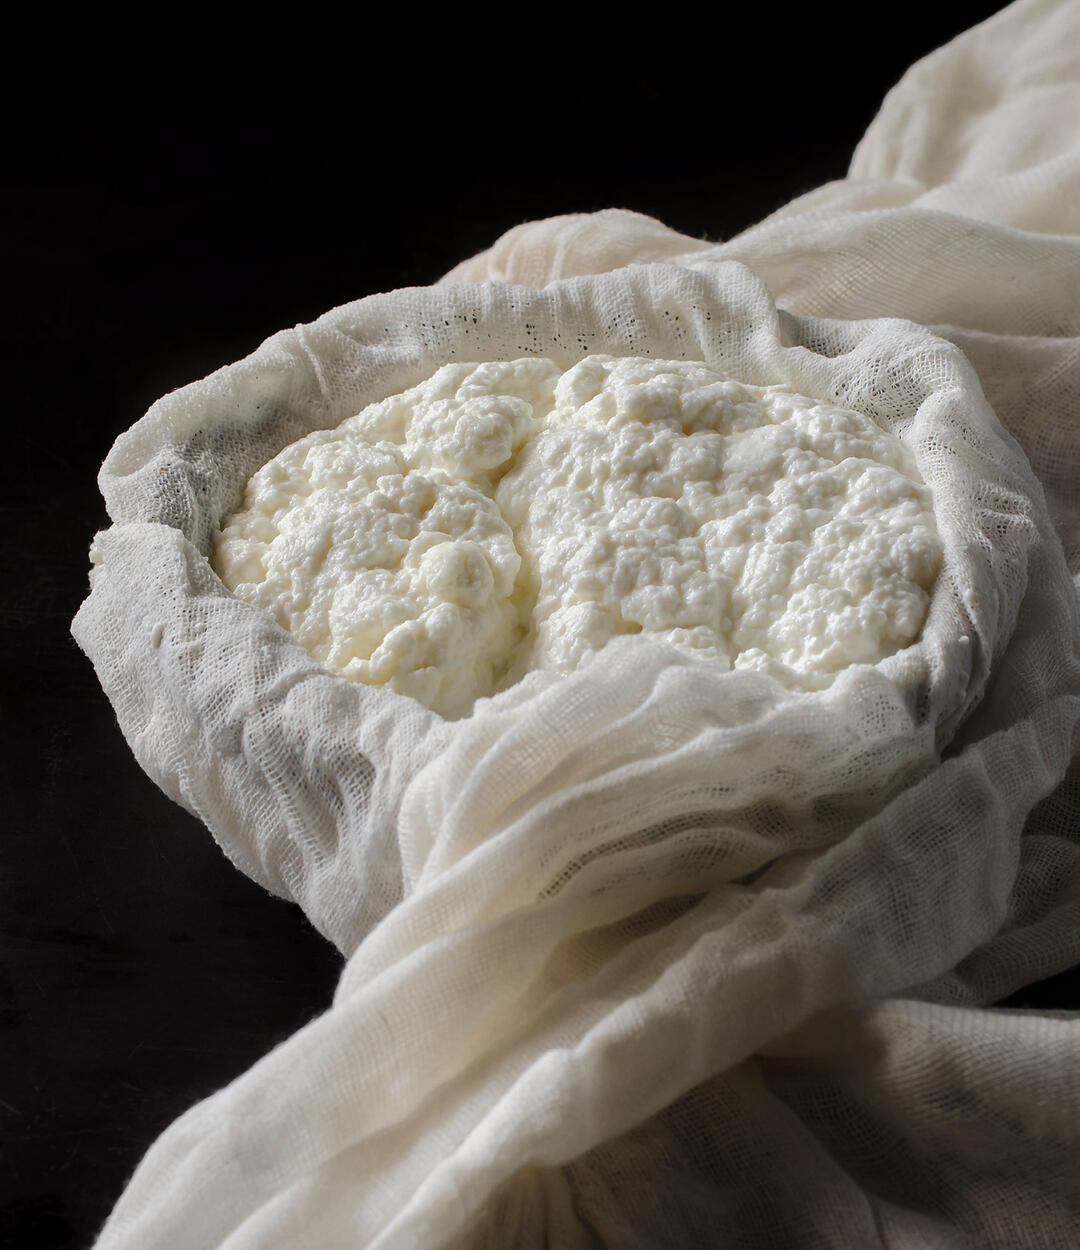
Strain
- Line a mesh strainer with two layers of ultra fine cheese cloth and set it over a large bowl.
- Gently scoop the ricotta into the lined strainer. Note: I use a solid spoon to get the bulk of the pillowy curds out of the pot and then switch to a slotted spoon to get the smaller pieces.
- Over a second bowl, place another lined strainer (single layer of cheesecloth) and pour the whey through it. Transfer any additional ricotta to the first strainer and then set the whey aside. Note: As mentioned in the intro, the whey is not waste. You may want to strain it once more time through a double layer of cheesecloth.
Drain
Continue to drain the ricotta for several hours in the refrigerator or overnight until the desired consistency is reached. As Chef Fox suggests, it's preferable to drain the ricotta thoroughly so as to control the moisture in the dish. You can always add some whey back in if it's too dense.
Yield
After about 15 minutes of draining, I end up with 1 1/2 pounds. The texture is still pretty loose but it's not soupy or watery. This is the point when I refrigerate.
Storage
The ricotta keeps for a few days in an airtight container. I've used it beyond that (smelled fine) but the cookbook suggests a few days so that's the party line.