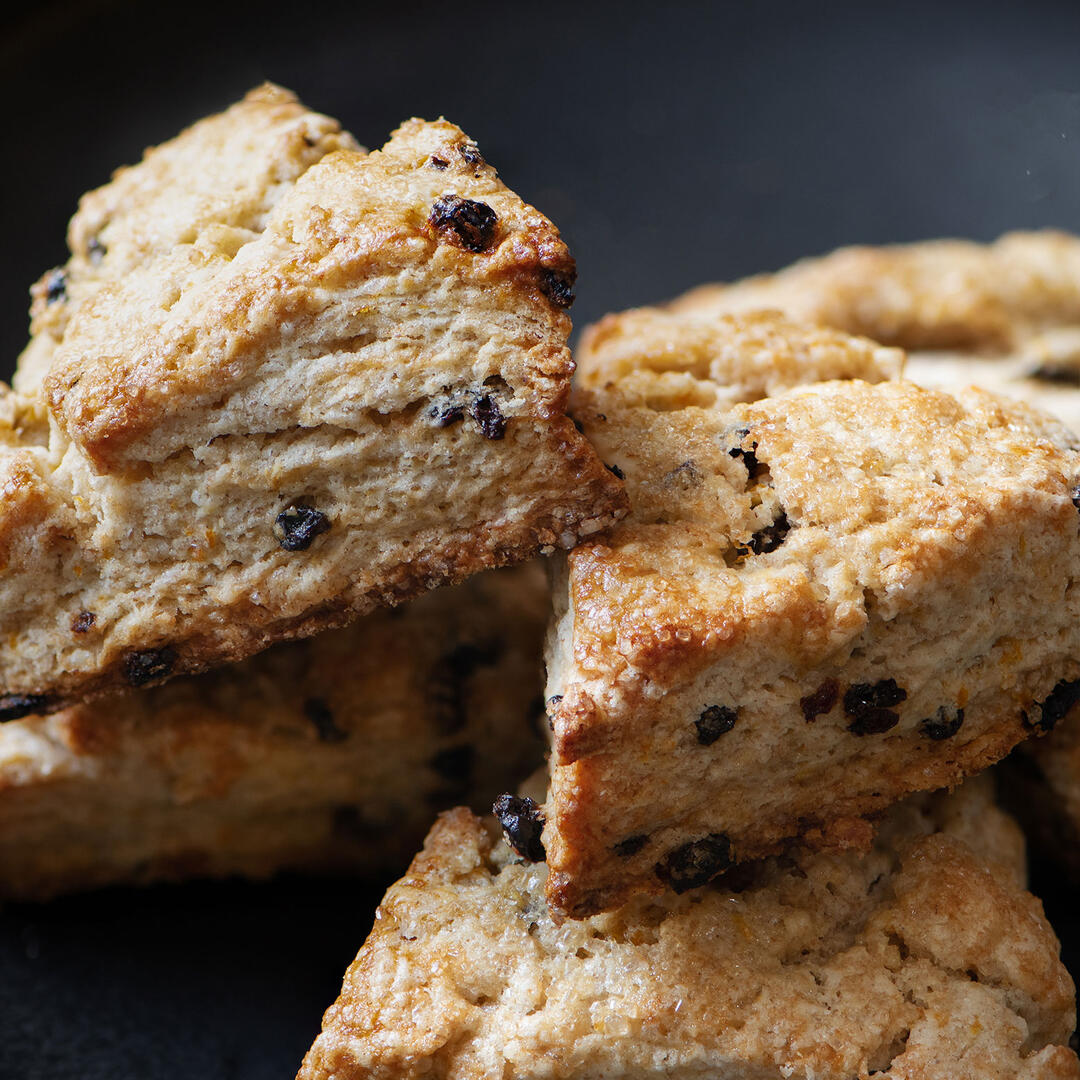
Zuni Cafe's Orange-Currant Scones
RECIPE UPDATED 1/9/24
When discussing the popularity of Zuni Café's Orange-Currant Scones, Chef Judy Rodgers wrote,
These scones always outsold sticky buns, fresh fruit turnovers, pain au chocolate, lemon coffee cake, and everything else the pastry department scrambled to bake. The Zuni scone is so well loved that we no longer bother making special pastries for Sunday brunch.
After making them several times, I feel deeply in touch with the fandom.
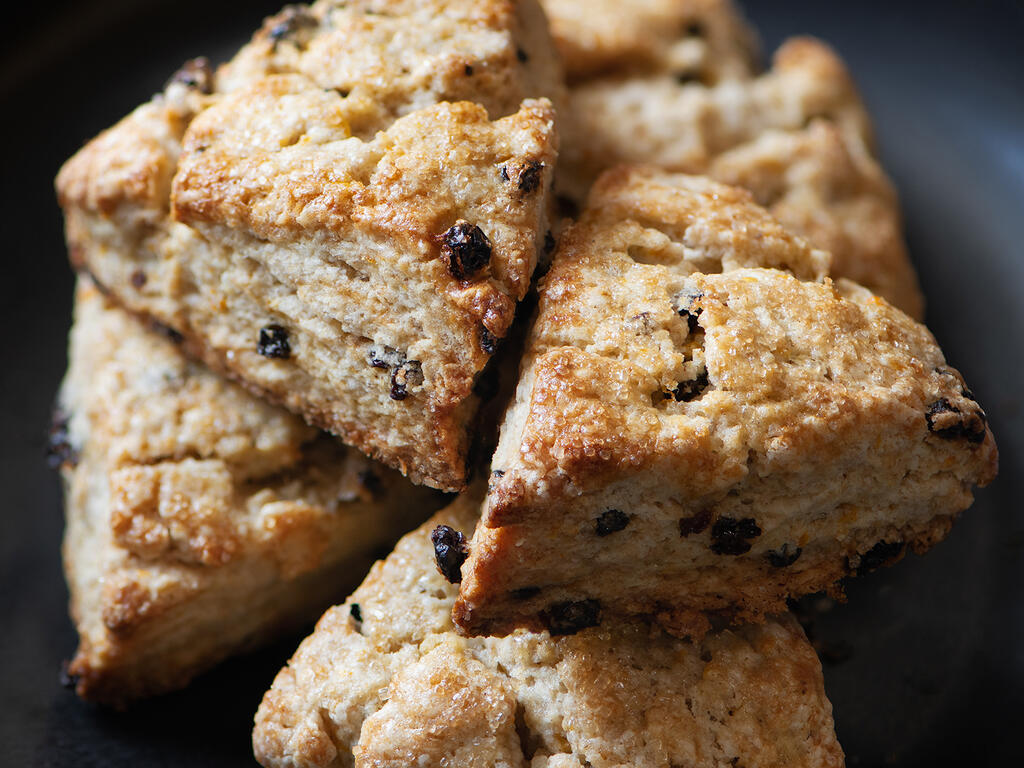
While there's no shortage of orange and dried fruit scone recipes, Chef Judy Rodgers' version dials up the zest, sweet Zante currants, and butter to pitch perfect heights. When topped with a crowning swipe of honey butter, I can't help but hope time will slow a bit for proper enjoyment.
My relationship with scones over the years hasn't always been this committed -- it was more a summer romance. I would meet many fine breakfast pastries while on vacation but the scattered attempts to recreate the magic at home were forgettable. That is, until I couldn't sleep.
Counting Sheep
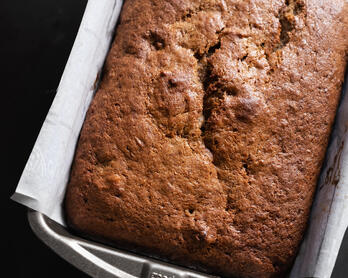
I have a habit of thinking about food when I'm laying awake and one night scones were the proverbial sheep to be counted. Maybe I was pondering flavor combos or shaping -- the specifics escape me -- but the effort to drift off was interrupted when I was struck by an idea. What about using an adapted version of my reliable all-butter pie dough technique for scones? It seemed too simple but made perfect sense. A textural marriage of pie dough and fluffy pastry, the steps and outcome predictable and dependable.
I gave the new method a go the next morning with Zuni Café's recipe and the scones turned out on the first try and on numerous occasions since. The repeatable process was on lock resulting in a crisp exterior, deeply browned bottom, and interior that rides the line between layered and fluffy. These scones fulfilled my ideal.
Below is the method paired with a gentle adaption that includes some whole grains and bump in the acidity.
To Each His Scone
One thought about texture before you go. Take a spin around the internet and you'll find a myriad of opinions about what constitutes a proper scone be it American or British. These include: a scone should not flake like a biscuit, should crumble but not be too dry, should have cream or no cream but also milk. Emotions run high in the way that adding sugar to cornbread can set some folk's hair on fire. I say make what you like just make a good version of it. This recipe is what I enjoy and has been quite popular with friends and family.
Oh, let us never, never doubt / What nobody is sure about. - Hilaire Belloc's, The Microbe (Lines 15-16) ...also borrowed by Willy Wonka
Recipe Tips
Light as a Feather
I'm an avid ingredient weigher but for whatever reason never bothered to weigh baking powder. I decided to add that step with the scones and was startled by how incorrect my measuring spoons were. The teaspoon was off by a couple of grams which doesn't sound like much until you consider that 1/8th teaspoon baking powder is 0.6 grams. Only the 1/8th measuring spoon actually got it right.
Also, I noticed that my butter was about 1/8th of an ounce underweight on two occasions. Perhaps it was a fluke or my scale was having a bad day, but shrinkflation and inconsistent measuring spoons is a point in favor of weighing your ingredients. 1/8th ounce isn't a big deal unless you're scaling the recipe, but still.
Happy Fails
This isn't a tip as much as a lesson I appreciated learning.
The Zuni Café Cookbook calls for milk and I wondered if using an acidic liquid like buttermilk was inhibiting the leavening power of the baking powder. I swapped in a small amount of baking soda (baking soda and baking powder aren't a 1:1 swap for what it's worth) and the orange's acidity and flavor were neutralized in a rather dramatic fashion. The scones tasted like flat cooked flour which is, interestingly, how many scones taste. The texture also wasn't improved. Baking soda reacts with acid (buttermilk, citrus) to create carbon dioxide and those bubbles give you rise. Acid is also flavor so in the case of the scones I neutralized some of the flavor.
It's always exciting when the science of cooking presents itself so clearly because it begs a heap of additional questions. Moving forward, I plan to give more consideration to ingredient lists that include baking soda along with acidic ingredients. Is the acidity meaningful to the flavor or is it just there to tenderize? Inquiring minds want to know.
Cold Weather
I made a blueberry version of these scones when the weather was cold (it was 50°F-ish outside...winter is relative). The butter stayed firmer during the pressing and rolling steps than it does when the counter and ambient temperature is warmer. When I tried to smoosh the pile together, it was more crumbly than desired and I struggled to get everything incorporated. I ended up just tolerating the excessive number of dry bits and shoving them into the mass to avoid overworking the dough. The scones slumped a little during the bake but turned out great otherwise. My thought for the future is to -- before adding the liquid -- let the dough temper or rest at room temperature for a handful of minutes. The idea is to let the butter warm up slightly so that things come together a little easier once the liquid is added.
Original vs. Adapted
Salt
The original recipe calls for 1/8th teaspoon salt (Chef Rogers used kosher salt or sea salt for everyday cooking). I increased it to 1/4 then to 1/2 which was just right for me but I lean savory with baked goods. I settled on 1/4 teaspoon + 1/8 teaspoon for a happy medium.
Acid
I didn’t have whole milk for my first attempt but buttermilk was on hand so that’s what I tried and the change stuck. Buttermilk brings an additional layer of acidity that enhances the flavor without making the pastry perceptibly acidic. As already mentioned under "Fails" above, I had some initial concerns about only using baking powder with buttermilk but those turned out to be unfounded as the texture was quite light. I also increased the liquid amount by 20 grams.
Whole Grain
I swapped in 30% whole grain flour which is my normal move with 100% all-purpose recipes. If you make these scones without whole grain flour, I would probably recommend reducing the liquid by 20 grams per the tip above.

JJ's Lone Daughter Ranch // Santa Monica Farmers Market
Around The Dinner Table
I've gone on at length about the joys of eating and inhaling the smells of sourdough bread. Pair a warm piece with quality butter and there's no finer meal.
As an ingredient for scones or pie dough, butter deserves special attention given the percentage it occupies in the overall recipe. Here's a quick take on the qualities I look for:
- Cultured - For the flavor.
- 82%+ Butterfat - Europe requires butter to have a minimum of 82% butterfat but 80% is allowed for salted blocks (in France at least). The United States requires 80% for all types. Butterfat above 82% can be luxurious on bread or vegetables but the spread/structure of baked goods doesn't always benefit from more fat. You're probably not going to make cookies with 85% butter but the latter point still seems worth mentioning.
- Salted - For flavor and shelf life.
- French - From milk quality to processing, they take their butter seriously.
Culture
I go through a fair amount of butter and it's usually salted and cultured. The latter point is important as I prefer the company of ingredients that know, for example, that Pachelbel’s Canon is rubbish and makes Classical intellects want to throw things.
Musical taste aside, cultured also refers to the cream being fermented for 12 to 24 hours prior to the churning process. When cream ferments, lactic acid bacteria consume some of the sugars and transform them into lactic acid. It's a familiar process if you've ever made sourdough bread or sauerkraut.
This makes the cream more acidic (lowers its pH) and can make it taste tangy, tart, and refreshing. Some [lactic acid bacteria] can also produce a variety of aroma compounds, most notably diacetyl, which can give rise to a richer, more complex, and characteristically ‘buttery’ flavour. - Nordic Food Lab
Fermentation is a meaningful flavor enhancer in so many areas of cooking.
I Pledge Allegiance
Then there's the matter of location. The guest buttermonger on a recent Cutting the Curd episode made no bones about her preference for French butter on account of its fat content and quality of milk. AOC French butter (or PDO by EU standards) indicates a controlled designation of origin similar to how Italy protects Parmigiano Reggiano. It's intended to be a legal guarantee of quality, source, and ingredients. For example, if you buy beurre d'Isigny you can rest assured that those cows are living their best life grazing on the hills of Normandy.
I hadn't previously paid much attention to my butter's birthplace but the podcast prompted me to take stock. Here's the rundown of what circulates in my kitchen:
- Rodolphe Le Meunier // A respected French butter that's wrapped in flashy gold which does make me feel fancy. I've been buying this butter for years so I was unconsciously competent on that one.
- lIsigny Sainte-Mère Salted // Has charming yellow packaging that could double for a bed & breakfast shower curtain. Tastes excellent with a wonderful mouthfeel.
- Frentel Salted Cultured // Gold and red packaging. No tasting notes to speak of.
- Vermont Creamery Cultured Salted // The American butter I default to for everyday cooking like eggs.
- Clover European Salted // This one isn't cultured -- for shame. It is however available in many stores and what I grab if the pickings are slim.
- Kerry Gold // When on the road with the Airstream, Kerry Gold is often the high fat butter available so that's what I buy.
Am I a Francophile now when it comes to butter? Not really, my allegiance is split. For everyday uses I go with domestic brands and for anything else where the butter will sing (pie dough, scones, toast) I swing French. I could keep reading about the complexities of butter -- churning processes, cooling -- but for the purposes of buying a quality product I feel informed enough to move on. That is, until I deep dive into making my own butter because that's bound to happen.
Change My Mind
I haven't purchased unsalted butter in years. Some suggest that you could risk over-seasoning sweet recipes with salted butter but 99.9% of the time baked goods don't have enough sodium to begin with. That said, I'm always open to science or experience teaching me otherwise.
Chilled & Sliced Dough
Farmer's | Artisans
I make an effort to source my food from California artisans with a special focus on the Santa Monica Farmers Market. Below is a list of the folks who contributed to this dish.
- Apricot Lane Farms // Eggs
- Grist & Toll // Whole Grain Flour
- Polito Family Farms // Citrus
- JJ's Lone Daughter Ranch // Citrus
Cookbooks Referenced
Given the number of hat tips here on Chic Eats to restaurant and bakery cookbooks, it's safe to say that they tend to be some of my favorite resources. I'll leave The Zuni Café Cookbook review to Jonathan Gold.
And in her Zuni Café Cookbook, possibly the greatest, most generous cookbook ever written by a working American chef, she shared every technique she had. I am on my third copy. - Los Angeles Times, 2013
Tools
- Silicone Pastry Brush - I own both the small and large. One tip is to only hand wash this brush. I find that silicone absorbs off flavors/smells when run through the dishwasher.
- OXO Scale - This scale is a workhorse that I purchased over 10 years ago and only recently had to replace. RIP scale #1. It's a sturdy cooking companion that repeatedly gets covered in flour, sauce, or whatever else is flying around the kitchen. I recommend keeping liquids away from the screen since they can find their way inside. That being said, the scale seems to dry out and keep on measuring. Note: My original scale with the black pull-out display is now made in all stainless steel.
- Mesh Strainer
- Rolling Pin - I use a handmade dowel rolling pin and unfortunately the maker appears to be retired. This pin is a pretty close match.
- Pastry Scraper
My Favorite Cooking Tools spotlights the kitchen equipment I have owned and used for years.
Ingredients (12 Scones - Adapted From The Zuni Café Cookbook)
Scones
- 230 grams (8 ounces) salted butter
- 1 large egg (50 grams)
- 140 grams(just shy of 5 ounces ounces) buttermilk
- 120 grams (4 ounces) whole grain flour Note: I use Wit Wolkering, Einkhorn, Spelt, or Sonora which are all good for pastries.
- 270 grams (9 1/2 ounces) unbleached all-purpose flour
- 1.5 grams (1/2 teaspoon) Diamond kosher salt
- 19.2 grams (4 teaspoons) baking powder
- 100 grams (3 1/2 ounces) cane sugar
- 6 grams (1 tablespoon) freshly grated orange zest from 2 to 3 large oranges
- 74 grams (2 1/2 ounces) Zante currants Note: I store my currants in the freezer and keep them there until ready to use. The more cold ingredients, the better.
Egg Wash + Sugar
- 1 large egg
- 1 tablespoon milk or cream
- Demerara sugar for sprinkling Note: I've used organic cane sugar in a pinch though the granules are smaller.
Honey Butter (Optional - But why deny yourself such an easy component that can be made ahead?)
- 7 grams (1 teaspoon) honey
- 37 grams (2 1/2 tablespoons) slightly softened quality butter
Instructions
Prep & Chill
- Cut the butter into 32 pieces and put in the freezer for 15 minutes.
- Meanwhile, lightly whisk the egg and then combine with the buttermilk. Put the liquid back in the refrigerator to stay cold.
- Sift together the flours, baking powder, and salt. Reincorporate any bran flakes that are left behind in the mesh strainer/sifter.
- Rub the sugar and zest together until well distributed then whisk it into the flour. Transfer the mixture to the workbench. Enjoying the delightful smell of sugar and zest is an important part of this step. Note: If your house is warm, covering the flour mixture and refrigerating it for 15 minutes or so doesn't hurt.
Flatten and Roll
- Add the chilled butter cubes to the flour and toss to coat, then shape the pile into a rectangle roughly 12 inches long (lengthwise away from your body).
- Using a rolling pin and starting at the end of the rectangle closest to your body (6 o'clock), press down firmly on the flour/butter pile so that it begins to flatten out the fat pieces. After each pressing motion, move the rolling pin a little further away from yourself (towards 12 o'clock) until you reach the end of the rectangle, then work your way back from 12 o'clock to 6 o'clock. Scrape the rolling pin as you go if some butter sticks.
- Scrape up the flour and form into another rectangle. Repeat the process two more times. The butter should be somewhat flattened out by the end.
OPTIONAL - OBSERVE YOUR MIXTURE If it's a hot day and the butter is softening and leaving greasy streaks on the workbench, gather the shaggy pile into a bowl and refrigerate for 15 minutes. High-fat butters can soften quickly. Just as a point of reference, my dough never got above 59°F the last time I made the scones.
- Form the shaggy pile into a rectangle roughly 12 inches long (lengthwise away from your body).
- Roll the rectangle away from your body, then scrape the flour up and form into another rectangle. Roll away from your body again, scrape and shape, roll. A total of 3 times. The mixture will look layered like a dry lake bed or fish scales though it will still be quite rough.
- Continuing with the pastry scraper, "chop" the flour mixture from 6 o'clock to 12 o'clock, then turn 90 degrees and go from 3 o'clock to 9 o'clock. You're not trying to make tiny bits of butter, just a rough chop. Sprinkle the currants over the flour mixture and toss with the pastry scraper until distributed.
- Form the dough into a pile and make a well in the center. Add the chilled buttermilk mixture and then gently knock the sides of the well inward so that it mixes with the liquid. Scrape and toss the flour until the liquid is distributed, breaking up any large clumps of flour.
Smoosh and Shape
Here's where my pie dough (for those who use that recipe) diverges from the scone dough. You've done the important work of layering the fat and flour so now it's just about bringing things together.
- Smoosh the flour pile into a round mass, flipping it a couple of times while picking up loose bits. Divide the dough into two equal parts. Fold each round of dough over on itself once or twice, pressing it together and flipping it to pick up the loose bits. The bulk of the dough comes together easily with a small pile of sandy scraps. I isolate those smaller scraps and mush them together separately before working them back in. This helps me avoid overworking the dough that's already in good shape.
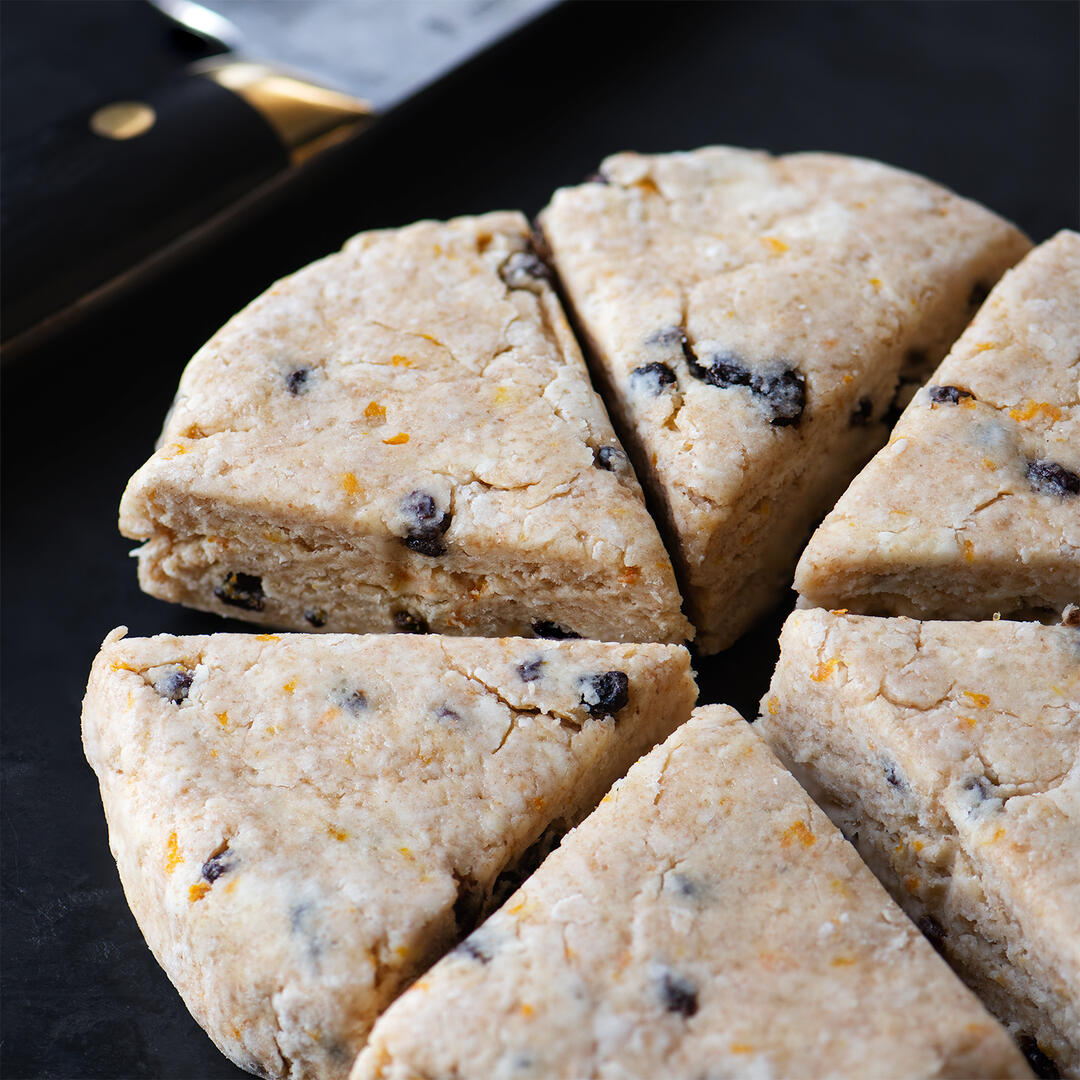
- Each round of dough should be about 4 inches wide. Lightly dust the workbench with flour, then roll each round so that it measures about 1 inches high and 6 inches wide. Wrap and refrigerate for 30 minutes. Note: Letting the dough rest before cutting seems to help prevent butter leakage when it's baking. I've seen it suggested that this is because the rest allows the gluten to relax, but it may be as simple as the butter is just firmer. It's the difference between slicing soft butter and chilled butter -- you're going to get a cleaner cut and less collapsed layers with the latter.
- Cut each chilled round into 6 pieces (12 pieces total), cover, then freeze for 30 to 45 minutes.
Brush & Bake
- Heat the oven to 350°F. Line a baking sheet with foil then place a piece of parchment paper on top.
- Whisk together the egg and milk or cream for the egg wash.
- Brush the chilled scones with the wash then sprinkle with Demerara sugar.
- Bake until the bottoms are nicely browned, there is some caramel-colored spots on top, and the internal temperature is around 205°F -- 25 to 30 minutes. Note: The tops will still be a little soft when the scones are done but they crisp up as the scones cool.
- Transfer the scones to a wire rack and let them cool. I generally don't eat them until they're just barely warm to the touch.
Honey Butter (Optional...but so good)
Mash the honey together with the slightly softened butter until thoroughly combined -- a fork works great. The honey butter keeps nicely in the refrigerator and can also be frozen.
Storage & Reheating
These scones don't keep very well at room temperature. That said, freezing and then reheating in the oven is a close approximation to day-of freshness. I suppose an even better approach would be to just have a stash of frozen unbaked scones but I haven't actually tried that.
- Wrap the cooled scones in plastic and foil, place in an airtight container, then freeze.
- To reheat:
- Heat the oven to 300°F.
- Remove any plastic wrap from the scones but save the foil. Very loosely wrap the frozen scones in the foil then place directly on the oven rack. Bake until the internal temperature indicates they're warmed through.
- Things that haven't worked as well:
- Using the microwave to accelerate the defrosting process didn't do the texture any favors.
- Partially defrosting the scones at room temperature before reheating was just ok. The exterior doesn't crisp back up properly in the oven.
Newsletter
Subscribe at the bottom of this page for the Chic Eats roundup. It includes new and updated recipes along with a grab bag of content that was interesting enough to share around the dinner table.