Naturally-leavened (Sourdough) Pizza Dough
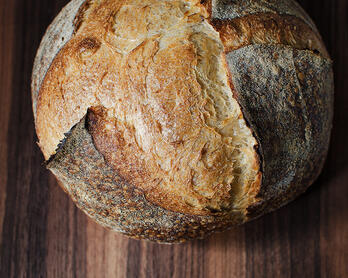
This naturally-leavened pizza dough recipe is the cousin of my sourdough country loaf. The fermentation time and inoculation (amount of levain or starter) were inspired by a conversation I had with Pizzicletta's chef/owner, Caleb Schiff. Other than that, I winged it and got lucky. The pizzas have been consistent from a flavor and texture standpoint so the formula feels ready for prime time.
Similar to my Flaky All-butter Pie or Galette Dough, this pizza dough recipe includes specific (sometimes quirky) steps and observations since I always aim for a repeatable process. In order to maintain a cohesive set of updates and conversation threads, this will be the only pizza dough recipe that I publish containing 90% or more type 00 flour. I've also included a public version of my pizza spreadsheet (woo spreadsheets!) that has a handy feeding calculator. Repetition and note-taking are an excellent way to dial in your dough and easily set a dinner time. Please don't hesitate to leave a comment if you have questions or need clarification.
But first...
Healthy Food Pet
The most important lesson that this sourdough journey continues to teach me is that the vitality of my starter, Moomin, is paramount. No amount of fancy strengthening or shaping will make up for a lack of nurturing. Feedings should be consistent, the starter should rise and fall predictably, and the smell should be sweetly fermented rather than acidic when ripe (smell the mixture at different stages and you'll understand what this means). Become one with your food pet so that you can help it grow up and achieve its full fermentation potential.
For this recipe, your sourdough starter should be a bit beyond peak (the point at which it has fully doubled) when you mix the dough. Circling back around to smell, there is a noticeable difference in acidity between a starter that is peaked and one that is long past that stage and has been resting in the deflated stage. Additional info can be found in How to Make and Maintain Sourdough Starter.
Recipe Tips
Data Points
There are numerous factors that contribute to fermentation. Stabilizing at an optimal temperature helps keep things consistent and ensures that the timing stays on track. I recommend measuring the temperature of the dough every time you touch it, aiming for a dough temperature (DT) of 80°F for bulk and strengthening.
No Proofing Box, No Problem
I use a warm water bath to bring the dough up to its target temperature. Simply fill a deep-sided sauté pan with warm water and then place the dough's bowl directly in the water. Generally speaking, I use 90°F water when the dough is 70°F, 85°F water when the dough is 75°F, and so forth. I also turn the oven light on (but not the oven - yikes) and that warmth usually maintains the target dough temperature (DT). Sometimes the oven can be too warm if it's a hot day so always keep an eye on things until you're comfortable with this method. For context, my home is usually about 73°F.
Baker's Best Friends
Your scale and digital thermometer are your best baking friends. I occasionally scoop and scrape when making things like granola and steel cut oats, but even then I still weigh the sugar and honey.
Flour
The flour in this recipe is 100% type 00 with an optional substitution of 5-8% whole grains. If you're new to naturally-leavened pizza, I recommend going with all 00 flour to get a feel for how the dough performs. Omitting the whole grains creates a very forgiving and stable dough. In the event that you want to add whole grains, here are some observations based on limited my experience. This section will likely be updated in the future.
I've substituted up to 8% whole grains (using either Grist & Toll's Hard White or home-milled Kandarian Organic Farms Khorasan) without any changes to the formula. Whole grains can make the texture a little chewier and stretchier so it's worth incorporating that ingredient incrementally. Additional notes for whole grains:
- The dough will be more active so the wiggle room in terms of when you bake is a little smaller (but just a little).
- The dough can be a bit stronger from a gluten development standpoint depending upon what kind of whole grain you're using. Though this isn't all that noticeable when using less than 10%, I've mind-melded with my pizza dough and can detect very slight changes.
Sticky Situation
When properly floured and proofed, this pizza dough should not stick to your hands, the counter, or the pizza peel. You can use a heavy hand to dust when stretching the pie skin and somehow it all melts away by the time you pull it out of the oven. That being said, I try to get all of my dusting done in one shot. I generously flour the workbench and then, after placing the dough on the counter, generously flour the top. You're not rolling the dough so only the flour that needs to stick will stick. If your dough is tacky or hard to work with after following these steps, it may be underproofed or too hydrated/wet.
Oven
On the flour note, I bake type 00 dough in a 800-900°F Roccbox. I haven't tried this recipe in a conventional oven and have read mixed reviews about 00 flour's performance at lower temperatures. If you decide to try 00 dough in your oven (500-550°F), consider a quality pizza stone like a baking steel and perhaps place it on the oven floor for maximum heat (unless placing it on the floor is a hazard for your equipment, obviously). Also, pre-heat for an hour.
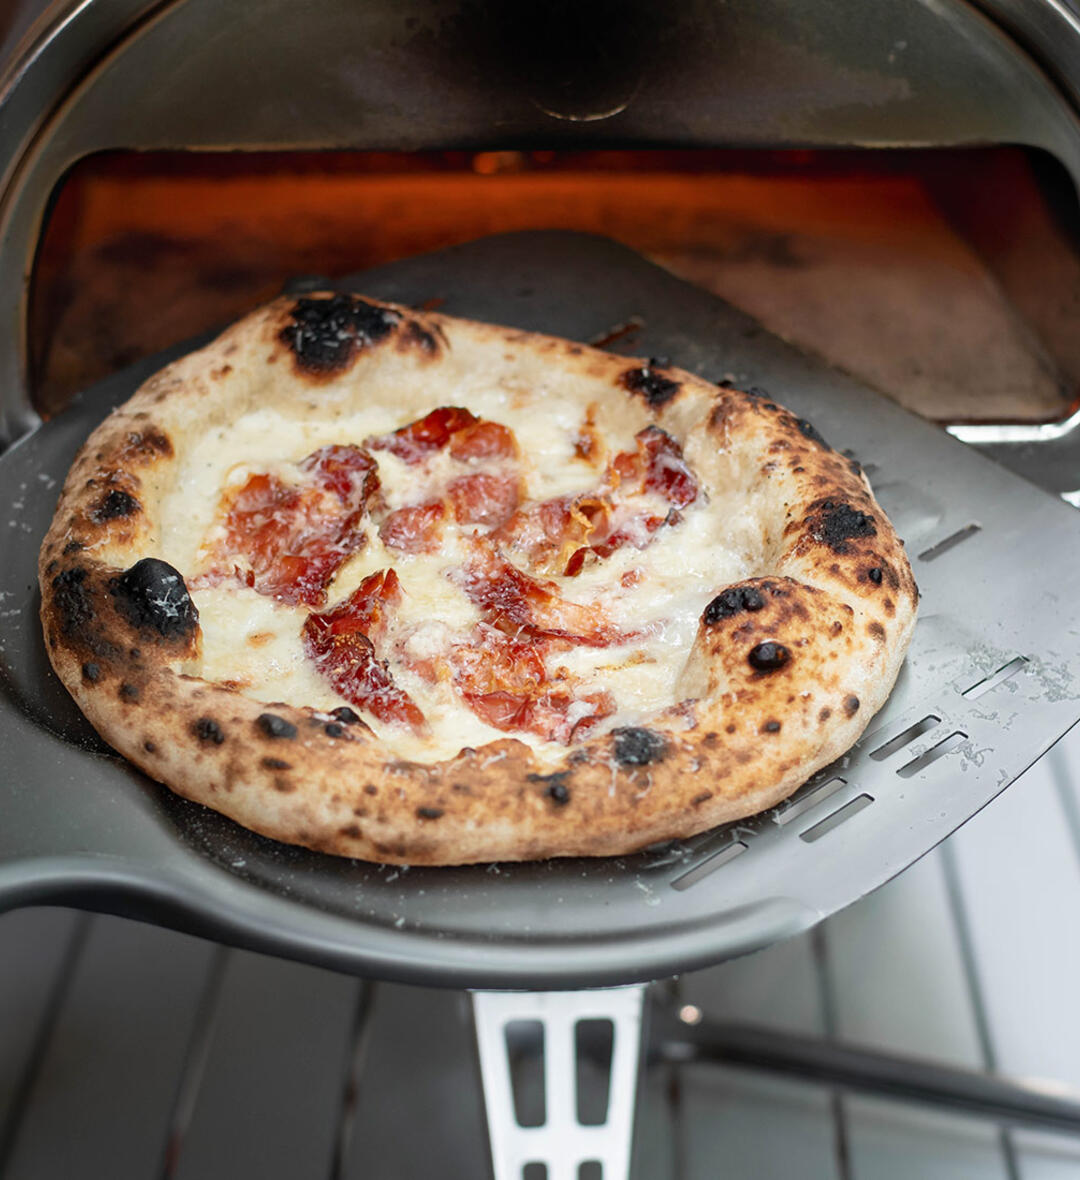
Flashy
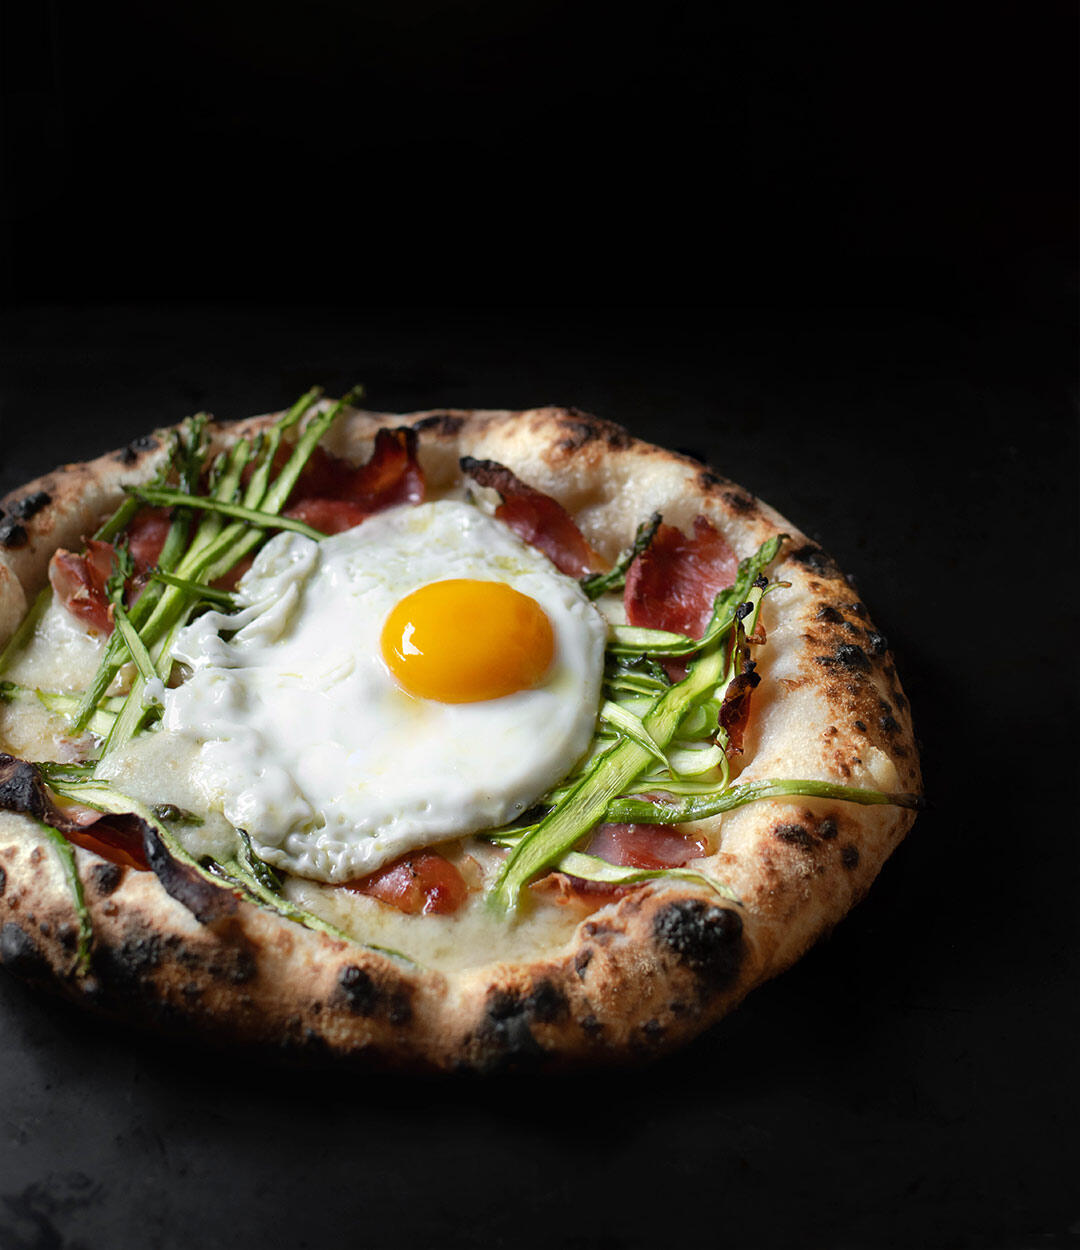
How flashy you want the cornicione or outer edge to be is up to you. I adjust things depending upon my mood and toppings. With photo 2 (above), I left more than the prescribed 1 inch around the edge. Start with 1 inch and then play around with things to see what you like.
Timeframe
If you want to shorten the fermentation time from 3 days to 2, increase the starter from 8% to 15%. I've tried this approach a couple of times with acceptable results. That being said, type 00 flour benefits from the extended fermentation in all departments - development, char, and flavor -so that's what I recommend.
Go Your Own Way
My stretch/folds and salt addition are a little quirky. I do my best to explain the process but if questions remain please leave a comment or drop me a note.
Terms
The terms "sourdough starter", "mother", "seed", and "levain" are tossed around and I thought it was worth clarifying my understanding of them.
- Mother/Seed/Sourdough Starter - These are all the same to me. This is the food pet that you feed and maintain indefinitely.
- Levain - At a high level, levain is a portion of the starter that is destined for the bread dough. For example, some people maintain their mother/sourdough starter/seed with 100% all-purpose flour. A day or two before mixing their bread, they fork off some of the starter and feed it with some percentage of whole wheat. This whole wheat mixture is then used as the leaven in the bread dough.
- Starter/Levain - In the case of this recipe, starter and levain mean the same thing. I don't fork the starter to build a levain with a different flour composition but I do have a specific feeding pattern leading up to the mix.
There are always more complicated explanations available on the Interwebs, but for my purposes I'm keeping it simple.
Farmers | Artisans
I make an effort to source my food from California artisans with a special focus on the Santa Monica Farmers Market. Below is a list of the folks who contributed to this dish.
- Central Milling / Organic Type 00 Flour (Normal)
- Grist & Toll / Whole Grain Flour
- Trattore Farms / Olive Oil
Tools
- Roccbox - I have owned this pizza oven for two years and use it almost every week. As can be seen in my naturally-leavened pizza posts here and here, the results are top notch. The oven is portable, easy to use, and requires virtually no maintenance. It's an investment but I highly recommend it.
- OXO Scale - Measure all the things. I've been using this scale for many years and it has done a great job.
- Thermapen - I use my Mk4 daily for sourdough, coffee, meat, quick breads (doubles nicely as a cake tester), and more. It's fast, nimble, and a snap to clean.
- Pastry Scraper
My Favorite Cooking Tools spotlights the kitchen equipment I have owned and used for years.
Ingredients for Dough (Makes Two 8-ounce Rounds)
Levain/Leaven Build
- 90 grams Central Milling Organic Beehive (or unbleached all-purpose)
- 90 grams Grist & Toll Sonora (or whole wheat of choice)
Pizza
- 275 grams Organic Central Milling Type 00 Flour (Optional) Substitute 13-22 grams of the 00 flour with whole grains. No formula changes needed. See "Recipe Tips - Flour" above for additional notes.
- 22 grams ripe sourdough starter (85-90% hydration)
- 179 grams filtered water
- 6.1 grams fine sea salt
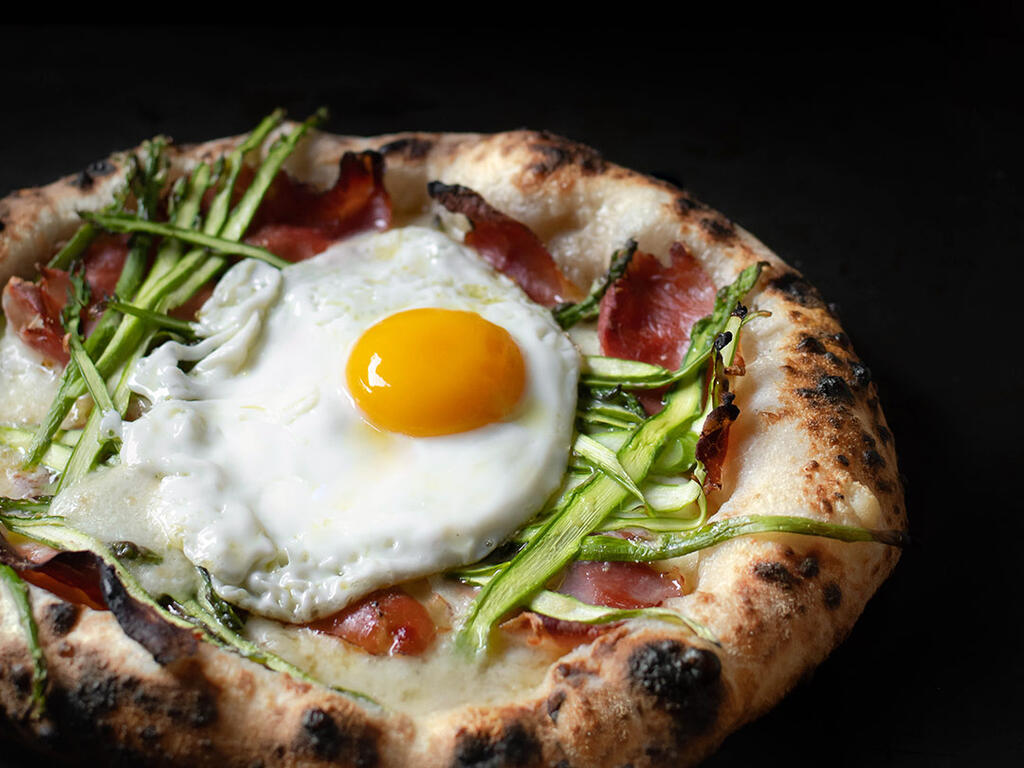
- Gjelina's Asparagus Pizza with Fontina, Garlic Confit, and a Fried Egg (Updated)
Instructions
- A public version of my pizza dough spreadsheet is available to be copied or downloaded. If you like to take notes by hand, it prints out on one page when "portrait" is selected for page orientation.
- Detailed instructions for feeding and maintenance can be found in How to Build and Maintain Sourdough Starter.
Day 1
Levain/Leaven Build
Note: I don't maintain my starter at 100% hydration so these ratios will be different if 1:1 is what you're used to. The mixture is a little "stiffer" meaning there is more flour than water added during each feeding. Also, the mixture should smell like fresh flour after the feeding. If the nose is acidic even after the refresh, consider lowering the inoculation (i.e. increase the fresh flour and water relative to the mature starter). Hot weather, missed feedings, or other environmental conditions can cause this to happen.
12:00 p.m. - Feeding 1 (Sometimes performed in the afternoon depending on my schedule so there's flexibility.)
Combine the following ingredients, mix thoroughly, and place in a warm area (preferably 73-76°F). I stir the mixture down about halfway through the feeding/doubling process.
- 30 grams mature starter || 50% inoculation
- 51 grams room temperature (70-74°F) filtered water || 85% hydration
- 30 grams Grist & Toll Sonora (or whole wheat of choice)
- 30 grams Central Milling Organic Beehive (or unbleached all-purpose)
11:00 p.m. - Feeding 2
Combine the following ingredients, mix thoroughly, and place in a warm area (preferably 73-76°F). If I remember, I stir the mixture once more before going to sleep.
- 15 grams mature starter || 25% inoculation
- 51 grams room temperature (70-74°F) filtered water || 85% hydration
- 30 grams Grist & Toll Sonora (or whole wheat of choice)
- 30 grams Central Milling Organic Beehive (or unbleached all-purpose)
Day 2
Note: By the time your starter is healthy and ready to bake, you should have a feel for how long it takes to double at different inoculations. For example, I don't recommend feeding with 100% inoculation during this step since the starter will be ready too early. Adjust the inoculation so that the starter isn't too far beyond peak when you mix in the evening. I go with about 50% depending upon the time of day.
12:00 p.m. - Feeding 3
Combine the following ingredients, mix thoroughly, and place in a warm area (preferably 73-76°F). I stir the mixture down about halfway through the feeding/doubling process.
- 30 grams mature starter || 50% inoculation
- 51 grams room temperature (70-74°F) filtered water || 85% hydration
- 30 grams Grist & Toll Sonora (or whole wheat of choice)
- 30 grams Central Milling Organic Beehive (or unbleached all-purpose)
11:00 p.m. - Evening Mix
- Once the starter is mature (see "Healthy Food Pet" above), portion out 22 grams in a medium bowl, add 179 grams of filtered room temperature water, and dissolve the starter thoroughly. This will take a few minutes of stirring and mashing with the back of a spoon.
- Add the flour and mush around until well combined. Note: This is a stiff mixture. Make sure to inspect the dough and look for any dry flour bits.
- Once the dough is well mixed, place the rough mass back in a clean bowl that is lightly greased with olive oil. Lightly oil your hand and pat the top of the dough to help keep it from drying out. Cover the bowl securely in plastic wrap, punch two small slits with a paring knife, and put in the refrigerator. Note: There is little to no rise while the dough is in the fridge so a small bowl is fine though I always maintain an air gap of several inches. Also, there is no need to leave the bowl out at room temperature. As soon as it's mixed, put the dough down for a cold nap.
Day 3
Flip It
Sometimes the top of the dough can start to dry out. With barely damp hands, work your fingers under the dough and flip it over - it should not be sticking at all. Cover the bowl tightly with plastic, punch two small slits with a paring knife, then put back in the refrigerator.
Day 4
This is the point in the spreadsheet where you can plug and play your way to a perfectly scheduled dinner. The start time listed below can be adjusted back or ahead to fit your needs.
Temperature Transition
1:00 p.m.
- Remove the dough from the refrigerator and place in a warm water bath (roughly 95°F) with a towel draped over top (see "Recipe Tips - No Proofing Box, No Problem" above).
1:30 p.m.
- After 30 minutes, the dough temperature (DT) will be around 65-70°F. With damp hands, work your fingers under the dough and flip it over. The dough shouldn't stick at all. Cover the bowl with plastic, change out the water so that it's 80-85°F, then put the bowl back in the water bath. Cover with a towel.
Salt Addition (also Fold 1)
2:10 p.m.
- The DT is usually around 75°F at this point depending upon the ambient temperature.
- If your dough has been sticking to the bowl, either clean it or grab a new bowl and lightly grease it with olive oil. You don't want any little bits snagging the dough.
Note: I have had the same specific way of stretching and building my pizza dough for as long as I've been making it. There are of course alternative ways to approach some of these steps.
- Lightly oil a workbench (I use my granite counter).
- Place dough on the workbench then press and flatten into a disk. Gently pick up the edges and jiggle the dough to stretch it out to a 10 or 12-inch circle. There should be no tearing and virtually no resistance - the process goes very quickly. If your dough tears, consider that it may be sticking to the counter.
- In your mind, divide the salt into roughly 6 portions. Sprinkle one portion of the salt across the entire surface of the dough.
- Now, think of the dough as having four quadrants - south, east, west, and north. Take a hold of the the bottom or south quadrant with both hands, stretch it out a bit, and then fold it back towards the center. Sprinkle salt on the 1/4 you just folded over. Repeat with the three other quadrants.
- Flip the dough package over and sprinkle the rest of the salt.
- With slightly damp hands, turn the dough over a couple of times on the oiled surface and then gently feel around the dough ball to ensure that all of the salt is adhered. You shouldn't feel much texture since most of the salt is worked into the dough.
- Place the dough package seam-side down in your oiled bowl and cover the bowl with plastic.
- Place the bowl in the water bath with a towel draped over top. The water should be about 85°F if the dough temperature is 75°F and 90°F if the DT is around 70°F. The target DT is 80°F.
Fold 2
2:35 p.m.
- Measure the DT. Note: Don't be alarmed if the salt causes the dough to seem a little wet or dimpled. That will go away after this step.
- With barely damp hands, remove the dough from the bowl and, holding it in one hand, use the other hand to gently flatten the ball. The dough should be easy to handle with no sticking. Next, hold the dough at 12 o'clock and 3 o'clock, jiggle it a bit, rotate a quarter turn, and so forth until it's about 8 inches across. There should be no tearing and the process will be quick.
- Next, gently pull the south quadrant out and back over the center (a stretch/fold) and do the same for the other three sides. Note: This can be done on a lightly oiled workbench if you're working with a larger batch of dough.
- Place back in the bowl seam-side down, cover the bowl with plastic, then cover with a towel. If the dough hasn't reached the target DT of 80°F (though it should be close), put it back in the water bath.
Fold 3
2:55 p.m.
- Measure the DT. You should have reached 80°F by this point if you didn't in the last step.
- With barely damp hands, remove the dough from the bowl and, holding it in one hand, use the other hand to gently flatten the ball. It should be easy to handle with no sticking. You'll hear some of the bubbles pop as you flatten the ball - that's your starter getting to work.
- Next, hold the dough at 12 o'clock and 3 o'clock, jiggle it a bit, rotate a quarter turn, and so forth until it's about 8 inches across. There should be no tearing. Then, gently pull the south quadrant out and back over the center (a stretch/fold) and do the same for the other three sides. Place back in the bowl seam-side down. Cover the bowl with plastic then cover with a towel. Note: Listen to your dough as you go. It will start to strengthen and may not want to stretch quite as far as it strengthens which is fine.
- Use your oven light for warmth if needed (see "Recipe Tips - No Proofing Box, No Problem" above).
Fold 4
3:15 p.m.
- Measure the DT and make a note of the activity. You'll see bubbles on the surface and continue to hear some of the bubbles pop as you flatten the ball.
- With barely damp hands, repeat stretch/fold step above. I stretch the dough to about 6 inches at this point.
- Place back in the bowl seam-side down. Cover the bowl with plastic then cover with a towel.
Fold 5
3:35 p.m.
- Measure the DT.
- Lightly wet your hands (they should just barely be damp) and repeat stretch/fold step above. I stretch the dough to about 5 or 6 inches at this point. Don't fight the dough.
- Place back in the bowl seam-side down. Cover tightly with plastic and cover with a towel.
Shape
4:20 p.m.
- Lightly oil two containers or one larger container and set aside. Note: I prefer that the dough balls not touch as they rest and relax. Sometimes dough needs its privacy.
- Get your scale and pastry scraper. Oil the scale and your hands lightly.
- Pick the dough up and place it on to the workbench.
- Decisively cut the dough in half with the pastry scraper. Weight each half. You should have 8-8 1/4 ounce per round.
- Take one piece of the dough and gently press and flatten it into a 5-inch disk.
- Pick the dough up, hold it in one hand (or you can leave it on the counter - I just prefer to hold the dough), then use your other hand to fold the edges inward to form a little package. I use 6 folds to get this done. Note: I opt for Nancy Silverton's method seen in this video minus the flour.
- Turn the dough over so it's seam-side down and place it on the workbench. Using cupped hands, gently pull the ball towards your body - I'll refer to this as a "scooch". The dough will lightly stick to the workbench which will create tension. Be gentle but firm and don't apply so much tension that it tears. On the second scooch, feel around the ball for any large bubbles. I gently roll my fingers over the dough as if playing the piano. If a bubble pops and tears the dough, let the dough rest for a minute or two and then just scooch the dough so the tear is at the bottom. I scooch a total of 6 times. Note: This dough will be taut but not perfectly smooth as there will be a number of small fermentation bubbles.
- Pick the dough up and lightly pinch and close any open parts of the seam.
- Place the dough seam-side down in the lightly oiled container then cover tightly with plastic.
- Repeat with the second piece of dough.
- If the house is cold, I put the containers back in the oven with the light on.
Turn on the Roccbox
6:35 p.m. Note: If the dough is particularly active, I move this up by 30-60 minutes.
- I allow for about 1 hour to heat my Roccbox.
Mise en Place
7:00 p.m.
- Assemble the ingredients and any other tools that you might need. Note: I can't emphasize enough how important it is to have everything ready before stretching your dough.
- Flour the workbench thoroughly with 00 flour and then keep extra flour over to the side for your hands and dusting the top of the dough.
- Sprinkle your pizza peel with semolina.
Stretch
7:30 p.m.
- Flour your hands, then gently work your fingers under the dough and lift your pizza dough ball out of the container and place on the floured workbench seam-side down as it was in the box (though there's not a seam at this point). The dough should be pillowy and easy to handle though it may be a touch tacky at first. This issue will resolve with the flour.
- Gently slide the dough round around on the workbench to flour the bottom and ensure that there is absolutely no sticking.
- Generously sprinkle the top with flour.
- Put your hands side-by-side, and then using the tips of your fingers, tap-tap-tap the dough from the center to the edge, making sure to stop 1 inch from the edge (that inch is very important). The untouched dough will be lovely and full of fermented potential.
- Gently slide the dough around again to make sure the bottom is properly floured. Using your fists and avoiding that outside rim, gently rotate the dough until the size is about 10". The "bottom" of the pizza dough should be touching your hand. The process should be relatively quick as the dough is relaxed and gravity will be helping things along.
Top and Jiggle
7:35 p.m.
- Transfer the stretched pie skin from your fists to the pizza peel that has been dusted with semolina.
- Add your toppings.
- Jiggle the peel to ensure that the dough isn't sticking. If it sticks (usually somewhere around the edge when it happens) gently lift that part of the dough and sprinkle semolina on the problematic spot.
- Bake around 850°F.
Coming Up
- Subscribe at the bottom of this page for the Chic Eats monthly roundup. It includes new and updated recipes along with a grab bag of content that was interesting enough to share around the dinner table.